vrijdag 27 januari 2012

Friday Update

Work progresses on the first Brigand, be it rather slowly...

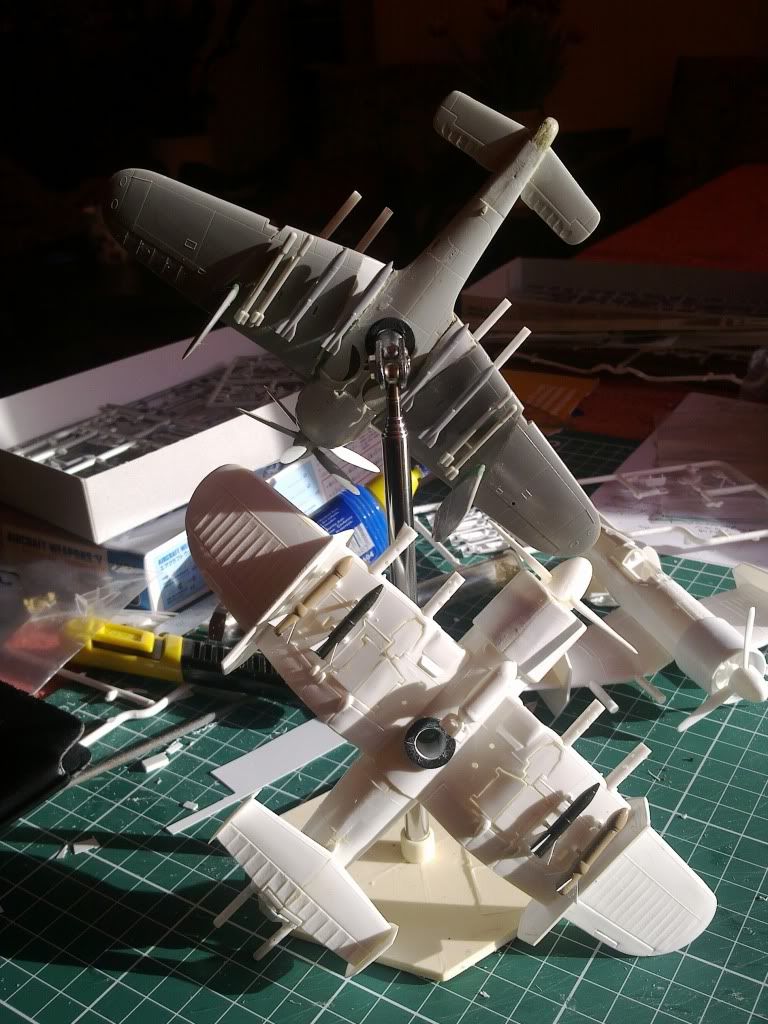
I spent some time hesitating about the colours to use. In the end I went with this:
The black areas on the fuselage still needs to be painted red as well.
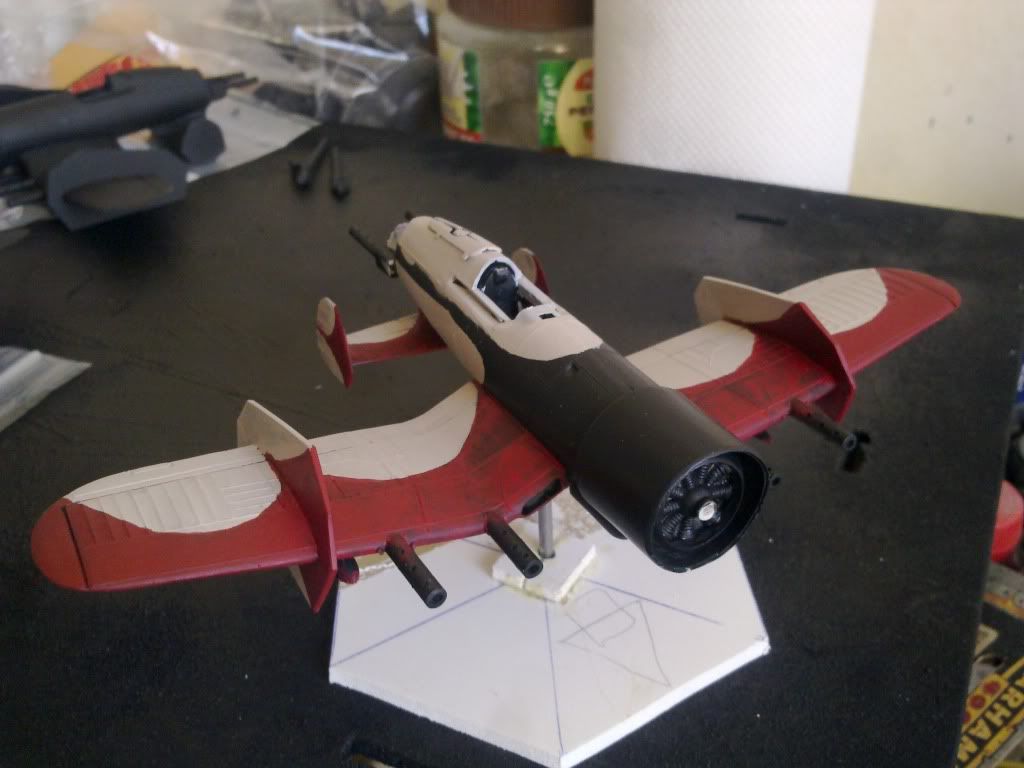
The red is slow going, as it needs lots of layers to get neat and even. After the main colours are done, I want to put a dividing line between the cream colour and the red, I'm considering either white, black or yellow?
I'm also thinking about putting a band of yellow and blue checkers on the engine cowling, for some nice contrast.
Markings and such I still need to decide on. There will be nose art though!

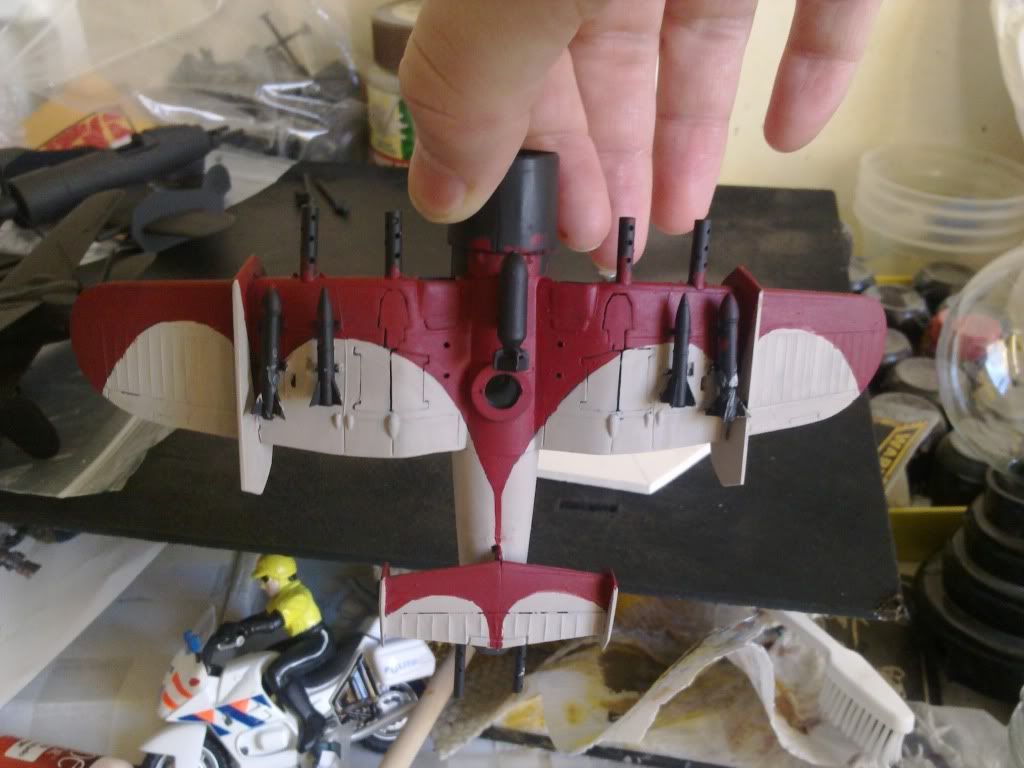
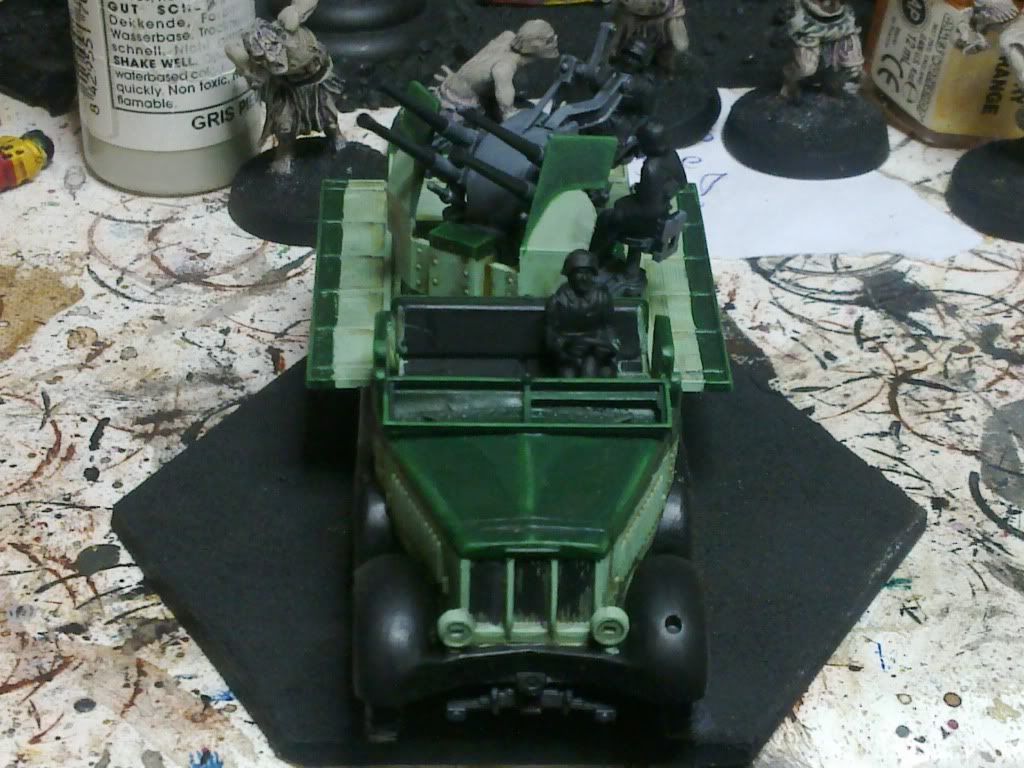
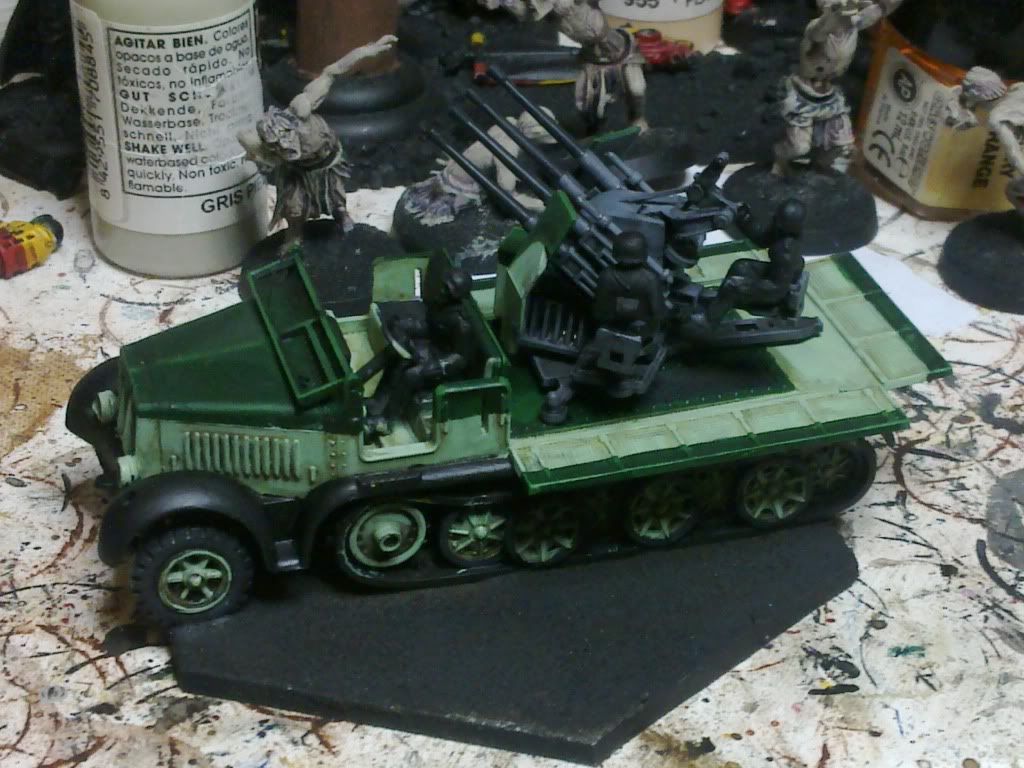
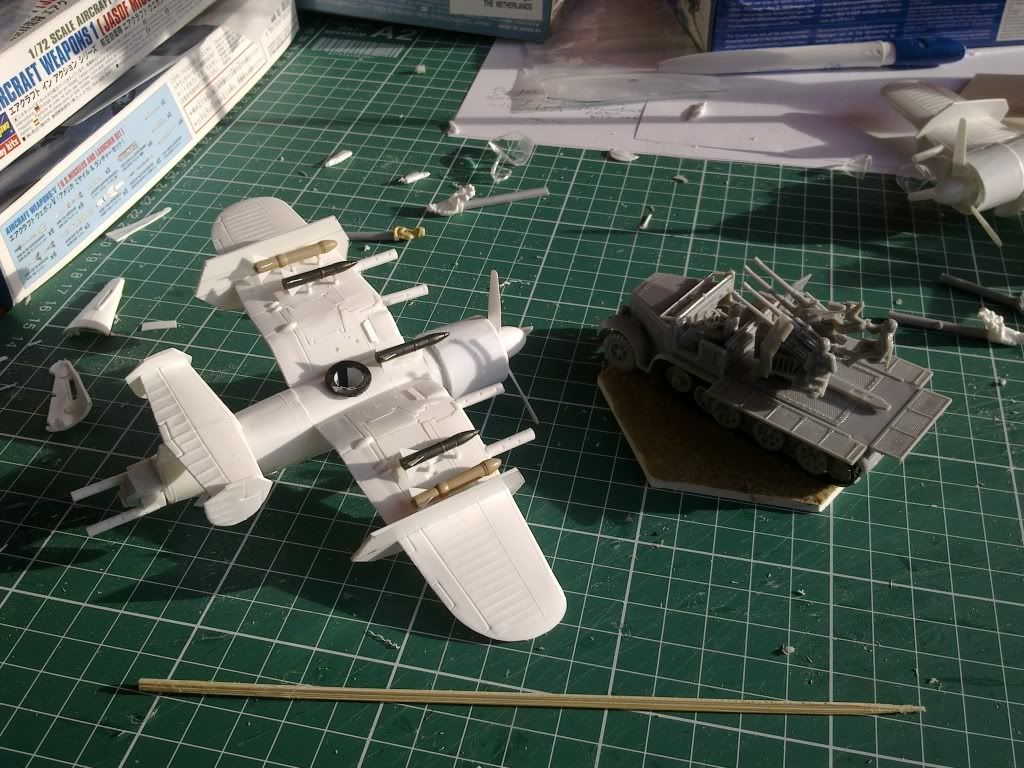
In addition, I spent the time the paint was drying to build this:
A militarized version of the DeHavilland Comet racing plane!
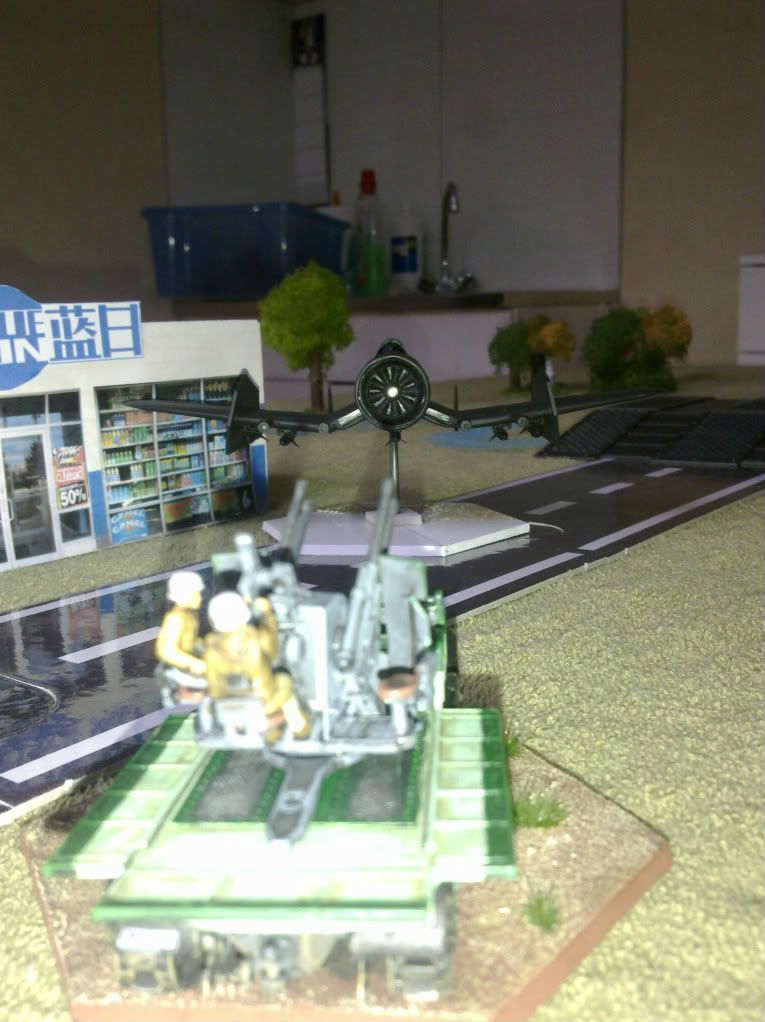
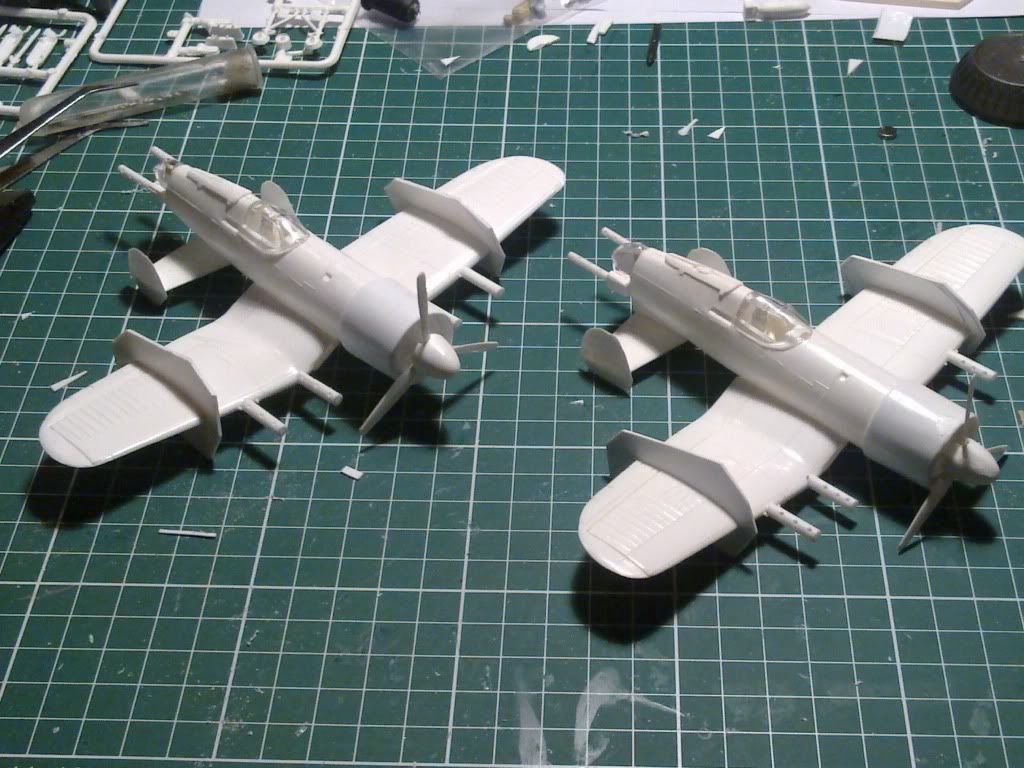
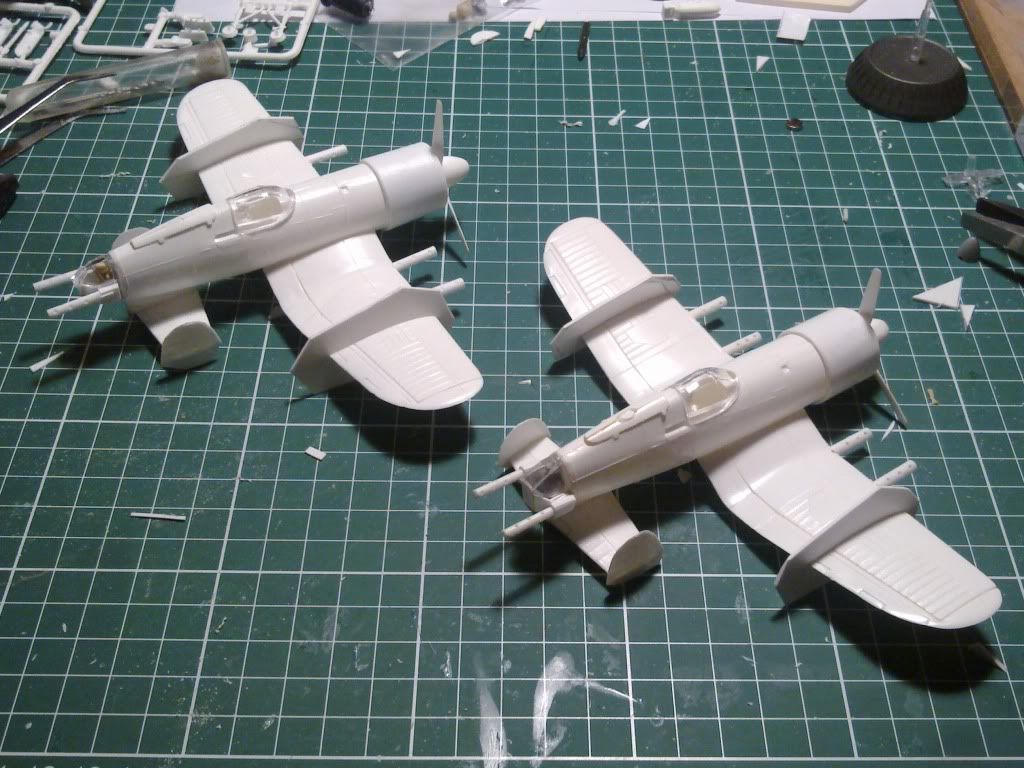
High speed, low armour, a .70 and twin .30 in the nose....

The base kit was the old Airfix kit. Not the best of kits, but useful and affordable for this sort of thing.
(I noticed Airfix has released a 1/72nd DH Comet again. I really hope that it's a retooling. This kit really isn't up to par for this day and age anymore....)
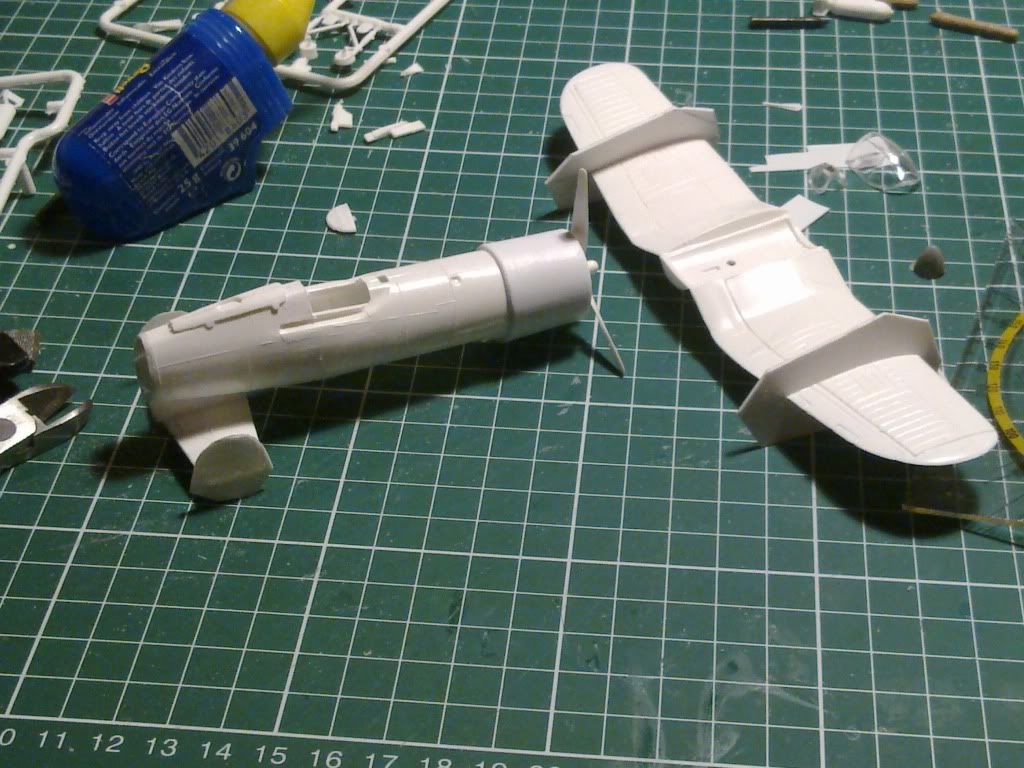
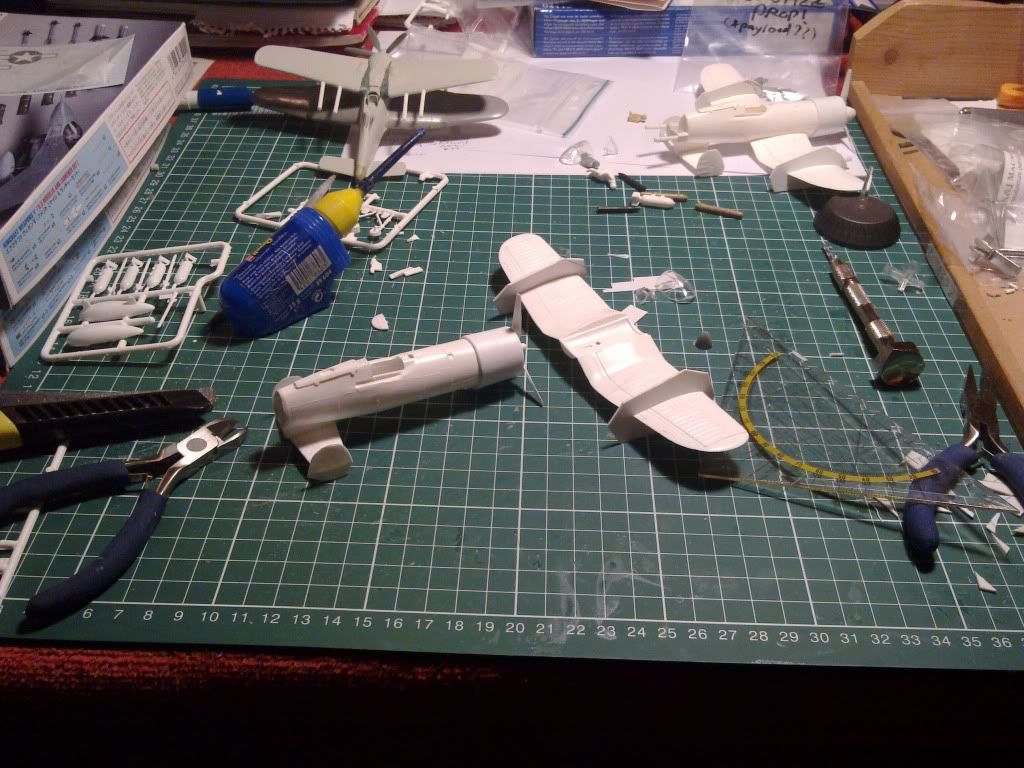
The fuselage is too narrow to put a proper plug in. So I just settled for glueing a 6x1.5mm rare earth magnet underneath and just hoping for the best. The plane is light enough anyway.

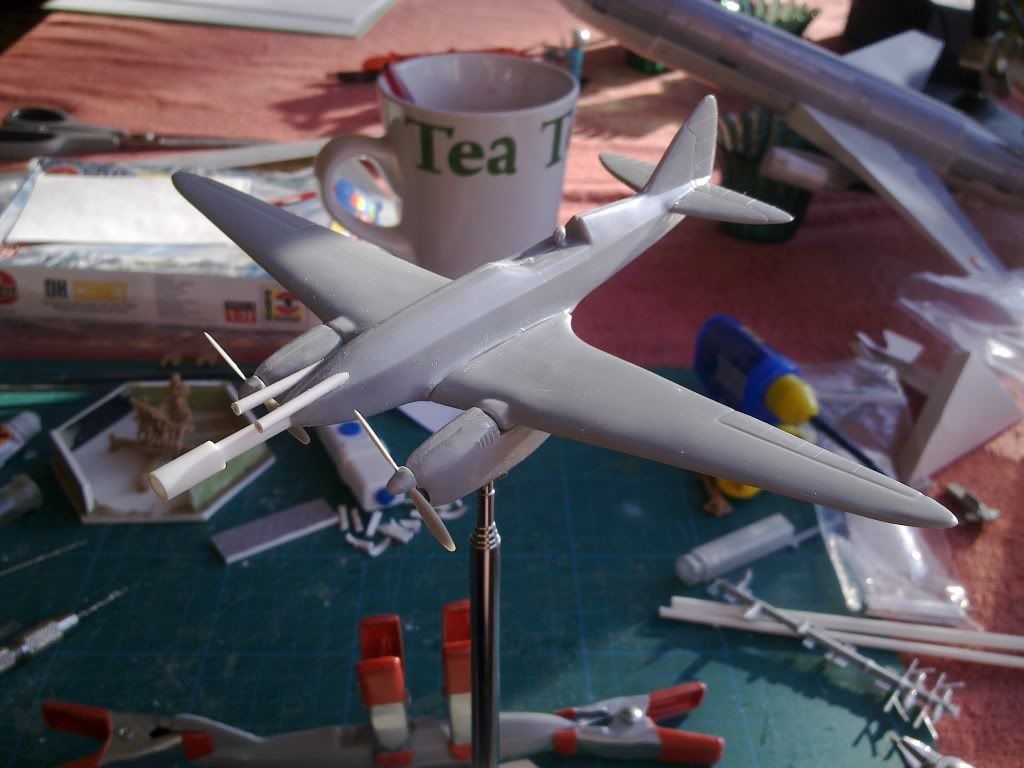
Edit: just realised, I didn't mention:
The .70 on the comet was made by carefully filing back the nose of the Comet, until the flat plane had the same diameter as the plastic rod (3.2mm, same as I used for the .50s on the Brigand). File carefully, and alternate the direction in which you file, so that the flat plane stays at right angles to the centreline of the airplane.
I then cut a 2cm length of the 3.2mm rod and a 1cm length of tubing that fit precisely over the 3.2mm rod. I glued the 2cm long rod in place on the nose (You can pin this if you want).
Then I glued on the 1cm tube. I made sure only 2-3mm of it protruded beyond the end of the solid rod.This gives the illusion of a hollow barrel, but still makes it easy to paint the interior of the "hole" black.
The .30s were simply 2 to 2.5cm lengths of 2mm diameter plastic tube. I cut them off at an angle and then carefully filed them to match the curve and angle of the fuselage. Once the angle is correct, cut them to identical length and glue them in place.

zondag 22 januari 2012

Sunday musings

Finished the Guntruck yesterday, but didn't have the light or the time to properly photograph it yet....

I did try a quick proof-of-concept solo game, using two of the 1/72nd planes, the guntruck and some random terrain I already have for other games.
This was a few game turns in:
I had one plane on the flight stand Gunbird loaned me, and the other on a semi-improvised "nape of the earth" base (essentially just a hex base with a nail in it....).


Here are my preliminary observations:

-I need to rip off the turret of the guntruck and magnetize it! Turning it is just way too fiddly at the moment....

-The idea for plotting movement works quite well. It's almost as quickly as just using regular hexes.
It requires quite a bit of on the fly fudging though, I had odd angles and half-hexes in shooting ranges almost every turn... Stacking models need a solution as well.

-The ratio of  base/hexsize to size of planes/terrain means you will make more use of high speed, low-G maneuvres. G-rating becomes less vital, and speeds feel slower somehow.
I guess I could see it as if each game turn represents only a second of real-time instead of the 5-10+ seconds it represents in the original scale. May need to extend the maximum number of turns you can play in order to get some action in.

-I don't have proper stats or damage sheets for ground based units! I'll need to figure something out for that....

-Don't do strafing runs over open ground towards a quad .40 AA gun... It'll bust your plane up bad. :-D
I really should have used the building for cover first and then "hopped" over it for a short range burst, in hindsight. Thing nearly sheared my wing off!

I didn't have the time or opportunity to see how the improvised altitude rules I posted a few days ago work out. May need to run another test game sometime just for that, if/when I have 2 altitude bases available.

Oh, and a second pic of cool moment in the game:
A tense moment before they discover who is faster on the trigger....

zaterdag 21 januari 2012

How I made the Brigand

I've had several requests to describe in more detail how I made the Brigand and Devastator in 1/72nd scale.
I'll start with explaining the Brigand. Sadly this will be a how-to without pictures: I've already built both Brigands I intend to build for the time being.
When/If I ever "need" to build a 3rd or 4th Brigand I'll update this how-to with pictures.

What you will need:
-1 Model of an F1U Corsair in 1/72nd scale. (I used an old Revell one, kit # 04112. It's an old, clunky kit with raised panel lines, but it was cheap....) Note: To save you some plasticard work, try to find a kit that has the rudder in two halves as part of the fuselage halves.
-.020"/.5mm and .040"/1mm plasticard. 
-A pair of small (2x1mm) rare earth disc magnets, if you want to magnetize the prop (which makes it harder to damage: to much force and it simply pops loose instead of bending/breaking)
-2.5 and 3.2 mm plastic rod/tube (for the guns)
-A spare canopy for the turret (fairly small, early Spitfire or Hurricane should do).
-Suitable bits to make the payload from.(In my case: a small bomb that came with the Corsair kit, 2 Nebelwerfer shells and 2 1/35 PaK shells...) 
-Something to make the prop spinner from (I used a part I cut from the drop-tank the Revell Corsair comes with.)
-Your usual model building tools


How to build it: 

Step 1: The fuselage:
Glue the two fuselage halves together per the kit's instructions but be careful not to glue the two halves of the rudder together.

If the instructions require you to assemble and glue the cockpit inside the fuselage at this stage, do so.


Step 2: Shortening the fuselage:
Just before the point where the rudder starts to rise from the fuselage, there should be a panel line. 
Use this panel line as a guide to saw the last part of the tail from the fuselage. Check that the two parts of the rudder are still separate and put the sawn-off part aside. 
Glue a plate of plasticard over the resulting hole, file flush with the fuselage.


Step 3: Turret:
Onto the plasticard plate you just glued on, build a turret to fit the spare canopy you have.
Use lengths of the 2.5mm plastic rod/tube to represent the .30 cal guns in the turret.
(Sorry, I can't give any more precise instructions on this. I always eyeball/improvise this step....)


Step 4: Building the tail rudders:
Trim and glue the elevators together into one plane (join them where they usually connect to the fuselage). Make sure the outside edge is straight, this is where you will attack the rudders/winglets.
Separate (saw or cut) the pieces of rudder apart from the stump of the tail you cut off in the second step. Saw off the lower 1/4th of them, save these pieces. Use the upper 3/4ths to make the rudder/winglets. 
Glue the lower quarter together, use these as the pylon that connects the plane of the joined elevator to the hull. Glue this assembly to the hull.


Step 5: The wings:
Assemble the wings, as per the kit's instructions. Wheels up or down? You decide.
Leave off any guns. Do not attach the wings to the fuselage yet.
Check the panel lines on the wing's upper surface. There should be a large panel over the guns, with two rows of 3 rectangular panels to the outside of these. Use the panel line that separates these two rows of 3 rectangles as a cutting guide and saw through the wings at this point. Your cutting line should run from leading to trailing edge. Make sure this cut is neat! You will be joining the wings back together along this cut later.
From the 1mm/.040" plasticard, cut the two directional stabilisers that intersect the wing.
You can use the hastily drawn and guesstimated template I used (see below) or improvise one yourself. ;-)
Glue the wings back together, with these stabilisers in between. Make sure the wings line back up.
Use the 3.2mm plastic rod/tube to make the .50 cals in the wings, 2 per wing. Glue one in the location where the centre of the 3 original wing guns were. Glue the second one at the bend in the wing. Pin these if you like them sturdy.


Step 6: The cowling and prop
Assemble the engine cowling (if a separate part from the fuselage) and magnetize the prop (one magnet in the prop, one magnet in the cowling/engine, where the prop axle would be. Watch your polarities!). Make and fit the spinner on the prop.
Next, cut a piece of .020" plasticard, as wide as the cowling is deep and long enough to wrap around it exactly once. Glue this around the cowling.
Plunk the prop in place.
Cut two pieces of .020" plasticard, wide enough to overlap the previous piece by a few mm front and read and each wide enough to completely wrap around the previous. Laminate these around the cowling, make sure the prop, when in place, just clears the front edge of these by a mm or so. Keep their curve as neat a possible.
Neaten up their front and rear edge and round of the edges. 
And there it is, your nice butch Brigand engine cowling.


Step 7: Final assembly:
Glue the cowling and wings onto the fuselage. Put in the fittings for the flying stand you want to use. Glue on the cockpit if you want to paint it solid, if not, leave it off until after painting. Fit underwing ordnance.
Make the retractable Zep-gear:
Take the hatches for the retractable tail wheel. Thin these down a bit, if they are thick pieces (they are on the Revell kit). Glue them onto the upper fuselage, between the cockpit and the turret, wide end towards the front, narrow end towards the rear. If needed, file them to be thinner still and match the curve of the upper fuselage. Take bit of putty/plasticard to fill the hole where the tail wheel would normally stick out between the hatches.


Step 8: Finished!
Sit back, smile, admire your handiwork...
(You're allowed to move it around and make flying noises at this point. I know I did....)


Step 9: Paint her up!
What colours? It's your plane, you decide!
Once painted, repeat step 8 to taste. ;-D

The Devastator will follow when I build the second one. To be totally honest though, I'm not a 100% satisfied with the way I built the first Devastator: It does the job and recognizable as a Dev. But, the lines of the fuselage are a bit off, and the forward view from the cockpit is a obstructed.  I may need to rethink that one, with a different plane to base the fuselage on.
We'll see.

donderdag 19 januari 2012

Started painting the AA truck

A quick update on where I got tonight:
And a better view of the two-tone livery:
What I've done so far:
-Painted, shaded and highlighted both green tones of the bodywork and wheels.
-Painted and shaded the grey of the chassis and AA gun (I'm still debating wether to highlight the turret or leave it as is.
-Repainted the fenders in good old-fashioned black.
-Painted the front tyres, roadwheel rubber rims and gunbarrels
-Basecoated and shaded  the leather seats on both truck and turret.

What I still need to do:
-Paint the dashboard.
-Do all the metals on the gun and truck.
-Paint the headlights, license plates and such details.
-Paint the crew.
-Paint and finish the base.
-Decide if, and where, I'd want a company logo. Not enough room on the side of the car, sadly.... Maybe put something on the turret shield? I'd need a name and design though. Currently I'm thinking about calling the company Bigg's Anti Aircraft Service, turning the logo/name into "Bigg A.A.S." :-P

woensdag 18 januari 2012

Thinking about rules

As I was preparing to primer the planes and guntruck, my mind turned towards the practicalities of actually gaming with these 1/72nd scale planes.
I've collected my thoughts on this matter below: 

The aircraft stands we will be using have telescoping sections. Seems a shame not to take advantage of that....
So, altitude rules are in order:
Climbing or diving:
Basically, when climbing or diving you exchange altitude levels and hexes of movement on a one-for-one basis: Use one hex of movement to climb a level. Dive a level, gain one "free" hex of movement. This extra "free" movement can allow you to move more hexes than your current/maximum speed.
Declare climbing or diving by adding +# or -# to your movement code in the plotting phase, # being the number of altitude levels you intend to go up or down.
Pushing it:
Climbing: You can safely climb a number of altitude levels equal to your max. acceleration (The reasoning behind this is that climbing speed is governed by engine power). You can Redline the engine to exceed your maximum climb. If you fail to Redline for climbing, you suffer the effects as normal. In addition, you will only climb one level of altitude. (Redlining for other reasons than climbing will not suffer this additional effect.)
Diving: You can safely dive a number of altitude levels equal to your max. G. (Seeing how a hard dive will stress your airframe...). You can Push the G's to exceed your maximum dive. If you fail to Push the G's for diving, you suffer the effects as normal. In addition, on a random movement roll result of 1-3 you will also drop one altitude level. (Pushing for other reasons than diving will not suffer this additional effect.)
Shooting:
Each level of altitude difference between you and your target counts as an additional hex of range. Turrets and ground emplacements halve this modifier (round down).

Tailing: 
If the tailing number is equal or greater than 0 and less than 3, the target must reveal "ascending " or "descending" in addition to the other information he must give. (Note that both declaring "ascending" or "descending" allows for staying level...) If the Tailing number is 3 or more, the target pilot must also declare how many levels he will ascend or descend.

Then there is the matter of the gaming surface...
The logical choice would be a huge (and thus expensive or labour-intensive) hexmat. The hexes would need to be rather large (I'm guessing 5" or so) as well.
Gunbird suggested an alternative: plot by laying out the maneuvre in loose hexes, like the Wizkids games.
This reminded me of the extra bases for ground units that I had cut...and the board they came from:
Yes, crappy camera strikes again....

I could also use the offcuts as a sort of ruler!

A quick test proved that combining both the hexes and the "negative space ruler" allowed me to plot movement reasonably quickly and smoothly:
 Start of move
 End of move... (And yes, not a legal move, I know.)

Of course, using this method will result in small deviations and occasional half-hex ranges/uncertainties. But I assume that we can resolve these in a gentlemanly manner.

dinsdag 17 januari 2012

3 Planes ready for paint. And a little extra...

Well, the third plane has been outfitted with underwing payload:
That's right, I decided that I just couldn't let the airplanes have all the fun by themselves!
Last night I built a little AA Guntruck....
It's one of those old Airfix kits. None too great on detail, but cheap and quick to build, perfect for my needs. (But God, do I hate those rubber tracks!)
I traced the base of the flight stand Gunbird loaned me onto some foamed PVC and cut out a hex base for the truck.
By using an identical base as the planes, things like facing of the turret and shooting between the truck and airplanes should be that much easier to manage rules wise.

The truck is still rather Germanic looking at the moment, but I have plans to change that. Or at least, make it less obvious.
I want to keep away from the stereotypical German army colours and use the paintjob to give a whole other impression:
 I figure that, after the collapse of the U.S.  many local airfields popped up, with certain aspects of their operation being subcontracted to local businesses. So, I want to paint my guntruck up as a 30s company or service truck. I'm still looking at exact colours. And I'd need a company name as well....
Any suggestions?

maandag 16 januari 2012

Getting closer...

Well, had a few nervous moments yesterday attacking my lovingly crafted conversions with a big brutish Dremel.
(The Devastator actually had a wing fall of during my "tender ministrations"...)
But the basing plugs are now in place! 
Here are the results:
Yup, found time to add the under-wing ordnance as well.
The Brigand is carrying HE rockets on the outer wing pylons, AP rockets on the inner wing pylons and a 100Lb bomb on the centreline mount.
The Devastator is loaded with a pair of Flash or Sonics on the outer pylons (because of their small size,they can be mounted two to a pylon), and AP on the middle and inner pylons.

I just need to do the payload of the second Brigand. She'll have a similar load as the first, but with a 3rd AP missile instead of the light bomb that the other one has on the centreline hardpoint.

Yes, I know that according to the rules the planes only have hardpoints on the wings....

I've decided to base the number of hardpoints for a plane on the information in Behind the Crimson Veil (p. 53 and 60).  This will lead to planes having odd numbers of hardpoints. It would seem only logical that one hardpoint is on the centreline in that case.

zaterdag 14 januari 2012

Almost there...

The main structure on the second Brigand is done. Here they are together:
All that's left to do now is add their underwing ordnance and figure out a colour scheme (any suggestions?). I'm thinking about doing something bold and colourful, befitting Crimson Skies.
Oh, and figure out their markings too.

woensdag 11 januari 2012

And BAM! the distraction gremlin strikes again....

In this case, in the shape of Gunbird and this post on his blog...

Well the bait has been taken:

A work in progress Corsair to Brigand (from the Crimson Skies series of games) conversion.

What I have done on it so far:
-Magnetize the prop (so it doesn't get damaged during play/transit)
-Cut the fuselage just in front of the root of the rudder and close the hole with plasticard.
-Use the 2 halves of the (unglued) rudder and the elevators to build the Brigand's underslung tailplane.
-Cut the wings, and glued the stabilizers (made from plasticard) in between.
-Enlarge the engine cowling with laminated plasticard.
-Glued the aft landing wheel hatches on the top of the fuselage to represent the fold-away zeppelin landing gear.

Still to do:
-Build the rear turret
-Add a spinner cone to the prop
-Add the comically oversized guns typical of Crimson Skies
-Decide on a paint scheme and paint him and his brother....

Oh, I forgot to tell you, didn't I. This is actually the second Brigand I'm building. A few years ago I already build one, and a Devastator as well...
You can just see them in the background of this picture:

There are some minor variations between the 2 Brigands (Due to not having the exact same canopy for the turret on hand, for example, and some slight variation in the shape of the mid-wing stabilizers. I don't have the same parts for the prop spinner either.). I'll have to explain these away as minor differences between versions of the plane, or field refits/repairs.

donderdag 5 januari 2012

Hmpf, it seems the camera is getting worse...
Anyway: today's progress:


And with a quick 5-minute mockup of a roof:


What I still need to do on this one:
        -scribe the brick on the sides of the roof walls
        -build a proper roof, the mockup is just thin cereal box cardboard.
        -build the inner walls and stair.
        -Oh, and actually build the doors and windows and such....
I'm actually considering putting off the inner walls, just to see how the building operates with just empty interior spaces. Or should I just forge ahead and save any modifications on the design for future buildings? Stick to plan on this one, and mark it up as "Experiment 1"?

woensdag 4 januari 2012

House 1, Floor 1 done

Well, here is the first floor of the first house:
Sadly my camera is on the fritz, hence the crappy image quality...
Only took me an afternoon, including scribing the brick texture in the walls, but I still need to do the interior walls and stairs.
I'm currently disputing wether to do that first, or build the second floor first.

dinsdag 3 januari 2012

The best laid schemes....

Not much done today, just done some drawing out and calculations for building the first house:
Note the random zombie and survivor to oversee the planning (and to check dimensions....).

maandag 2 januari 2012

Grrr, Arg....

Finished a quick paint job on a couple of Mantic games zombies today:
Nothing fancy paintwise:
-Basecoat of Vallejo Green Grey, followed by a slightly thinned wash of GW Leviathan Purple.
-Drybrush again in basecoat colour, followed by a second drybrush in 50/50 Vallejo Green Grey and Basic Fleshtone.
-Wash in GW Gryphonne Sepia (again slightly thinned).
-Give another light drybrush in the 50/50 mix, just enough to cover the highest points. (I covered my pallet while the wash dried, to save some on mixing. The wash dries fairly quickly anyway.)
-The loincloths and exposed bone were done with Vallejo Iraqui Sand (You'll see this colour come by a lot of times... I love it, it's so versatile!), washed with Gryphonne Sepia and higlighted with Iraqui Sand and Vallejo Pale Sand.
-Gore was done with 50/50 Tamiya Smoke and Tamiya Transparent Red.
And that's it!
Waiting for the wash to dry was actually the most time consuming part of the painting...
Luckily I had some chores to do to help pass the time. :-/

zondag 1 januari 2012

The start of a city

 So, now we get to the start of thing. Let's get this blog rolling!


Like I said in my introductory post, I game* a variety of settings and have several genres of miniatures in some state of preparation.. Several of these (Rioters and Riot Cops, Zombies, Appleseed, etc.) are traditionally associated with an urban enviroment.
Guess what I don't have, scenery-wise...
*: Or rather, "build stuff for", seeing how rarely I actually get to play....


So, a city needs to get built. Problem is: Zombies and Rioters are (mostly) contemporary, Appleseed and such isn't. And them I'm not even factoring in things like Warmachine....
My city will need to be flexible.

Here's the plan:
The buildings will be a mix of (somewhat) old-timey and current day brick buildings and more modern/sci-fi "slick"/concrete buildings. That way, by varying the ratio of "brick to slick" I use when setting up the table, I can slide from a bit in the past to the (near-ish) future.
I'm doing this because I also have some Appleseed miniatures in the works, and they require a more "future" city: Leave out the brick, and use only the slick buildings: Instant Olympus!

Somewhere in the future, when the city is far enough along, I could consider adding some typical Warmachine style buildings to complement the brick buildings. But, as I have enough alternatives for Warmachine terrain, that won't be necessary for some time.

The buildings:
Each building will be on a base with an integrated sidewalk.
Because I want the buildings to remain as flexible as possible, I can't have any "street furniture" permanently attached. But I don't like the look of street signs and lampposts with massive bases...
Plus, with permanently attached items or items on larger bases, there is the risk of damage if someone nudges them too hard while moving a miniature.
The solution? Magnets!
I'm painting the sidewalks with so called magnetic paint (paint with ferrous particles mixed in). I painted a set of test-bases and built a street sign and some lampposts (from Fenris Games) and glued magnets to the base of the poles:
[image]
Originally I had hoped to use magnets with the same diameter as the poles themselves.
Sadly the magnetic paint didn't have enough pull for that. That is why you see the larger diameter magnets under the lampposts.
Still a lot less intrusive than mounting the lampposts on bases, don't you think?
The street sign turned out to be secure enough with a double stack of magnets.
If anyone nudges them while playing, they will simply move out of the way, or fall over, without being damaged. :D

Last year (the day before yesterday ;) 
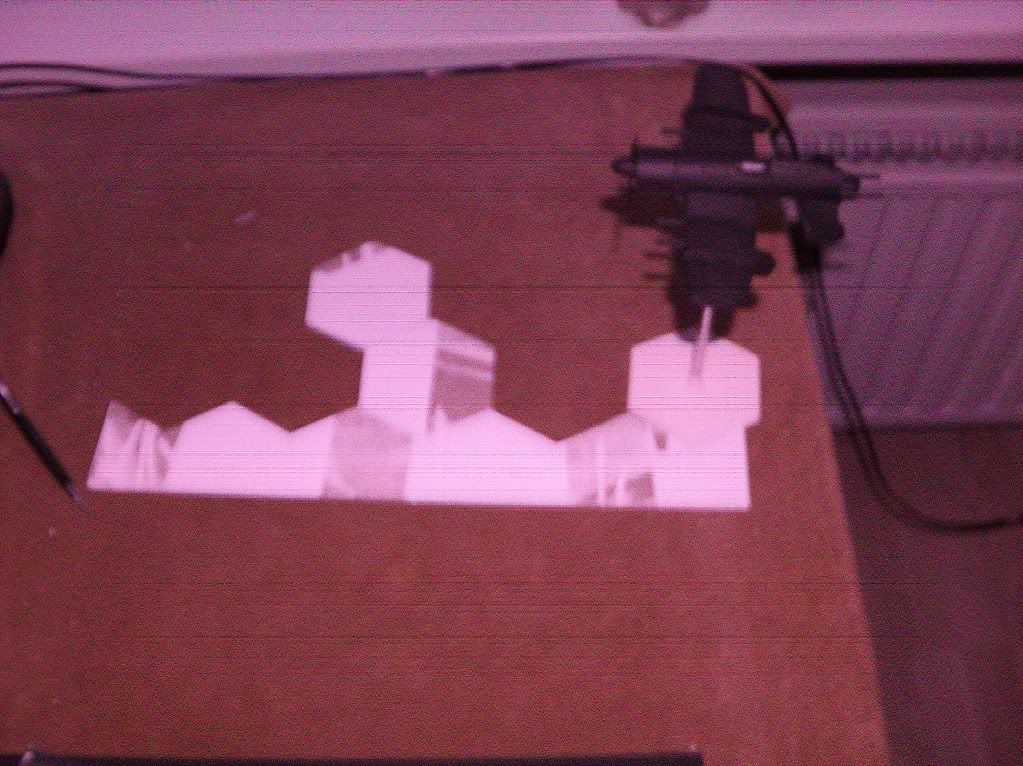
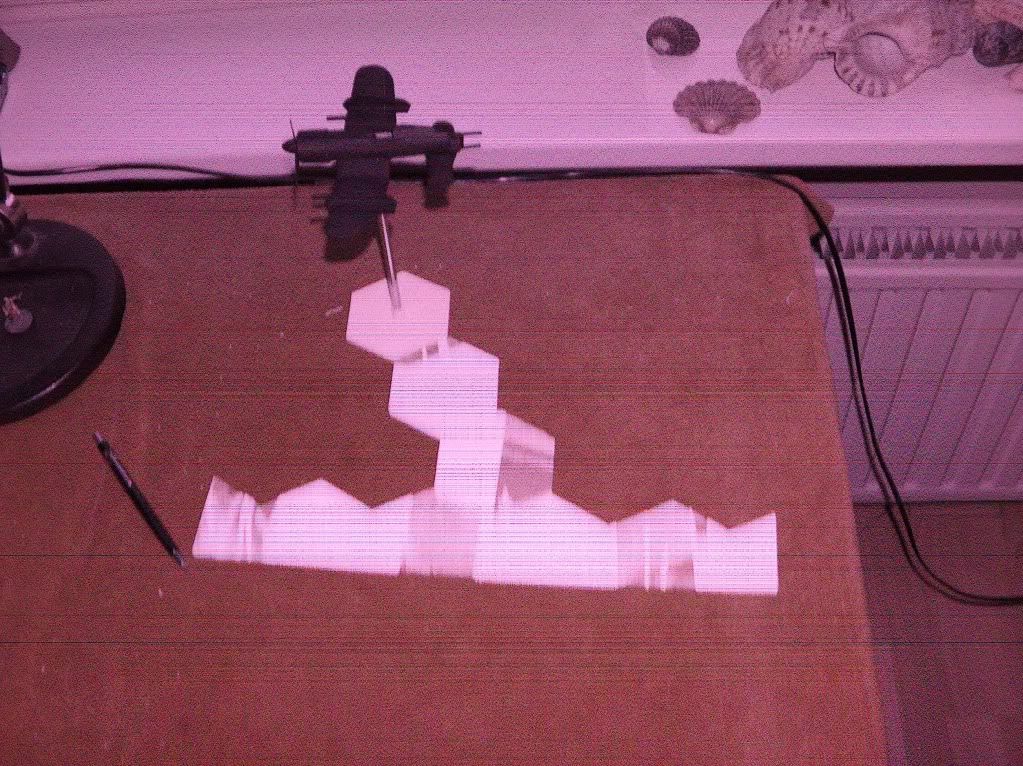
) I painted the magnetic paint on the majority of sidewalks. Here are the building bases with the magnetic paint drying:
[image]

I intend to have all buildings have an accessible interior. Mostly this will mean no more than some interior walls and stairs. I want to keep the interiors as uncluttered and useable as possible. The more I put inside, the less room for miniatures, and the more I pin myself down to a particular era or setting.
Plus, I like to have some of my sanity remain intact.... ;D

So I'm ready to start on the next phase: the buildings themselves.
I've got enough sturdy card and depron for the brick buildings. I still need to get the foamboard and/or foamed PVC for the slicker buildings, so those will come later.
That also gives me the time to work out shapes and layout for a couple of Appleseed landmarks: Onimal Coffee house and Akechi motors. I really like the idea of building these. I may build them with replaceable signage,though, so I can use the buildings themselves for other settings as well.

I couldn't help setting up a quick "proof of concept" with some of the stopgap scenery I'd been using so far:
[image]
[image]
[image]

Preliminary conclusion: Yeah, this is gonna work. :D I need more corners, though...


A start of sorts, and some introduction/preamble

Why start this blog?

Well, I've got "several" hobby projects that I alternate between, and it's getting hard to keep track of it all.
So far I've posted it all scattered over several forums, but I want to keep it all in one place for ease of reference. (And hopefully also to keep myself on track and maybe actually finish something for a change....)
I've started a blog before for my Space Hulk 3D project. But as I work on that project only rarely, that blog is infrequently updated and dormant the vast majority of the time. Boooring.
This time I intend to put everything I make/do hobby-wise in this one blog, in the hopes of keeping this one more active and to keep myself going.
Who knows, someone might even read it and maybe like what they see?

What have I done in the past (A.k.a. what could you expect to see)?

Most of that can be found in my Photobucket...
A few highlights:

-The Space Hulk project I mentioned earlier:
-The usual 40K stuff (and some =I=Munda stuff). I'm discovering however that the game, as it has become, doesn't hold my enthusiasm that much anymore. The background story is still very enticing, though (hence the =I=Munda)...
-Zombies, always a favorite!

-Crimson Skies, I just love the setting and the planes.
-I have a 20mm WWII (DAK) army lying unassembled and unpainted in storage somewhere...
-I'm also working on and off on some Appleseed miniatures:

Expect the occasional non-wargaming stuff too, like:
-Toys for my son

-Some amateur propmaking
(That skull is not mine by the way, but storebought....)
And lots more....


I tend to regularly switch from one project to another, whatever catches my interest at any given time.
(Unfocussed? I prefer to think of it as spontaneous and diverse. ;-D )

In the next post I will tell a bit more about what I'm working on at this moment.