Posts tonen met het label How-to. Alle posts tonen

woensdag 8 oktober 2014

Doing 'Shrooms!

Well, painting them, that is... You'll learn more below.

I've been in a bit of a hobby funk for the last few weeks.
The desire to do stuff was there, but no real drive or enthusiasm for any one project. So several things got started, but quickly abandonded again with a "meh" as enthusiasms faded as quickly as they took root. I think it's a combination of the weather/time of year and a general malaise/fatigue from a bad case of sinusitis that I just can't seem to shake. I've had Orks on my desk, Genestealers, Space Marines, I even dug out my old Hellgate London miniature conversions, but nothing got me fired up enough to actually get it finished. Quite frustrating.
Now, I know it's October, also known as "Zombtober" or "Orktober", and I have projects that could latch on to those themes, like I have in the past, but as said above, I just couldn't get excited about either. So I've declared this month to be "Do-whatever-the-hell-I-wantober"
To celebrate the start of this month, I decided to tackle this with a small, easy, manageable project, that I could get finished quickly. Hopefully getting something done would give the boost I needed.
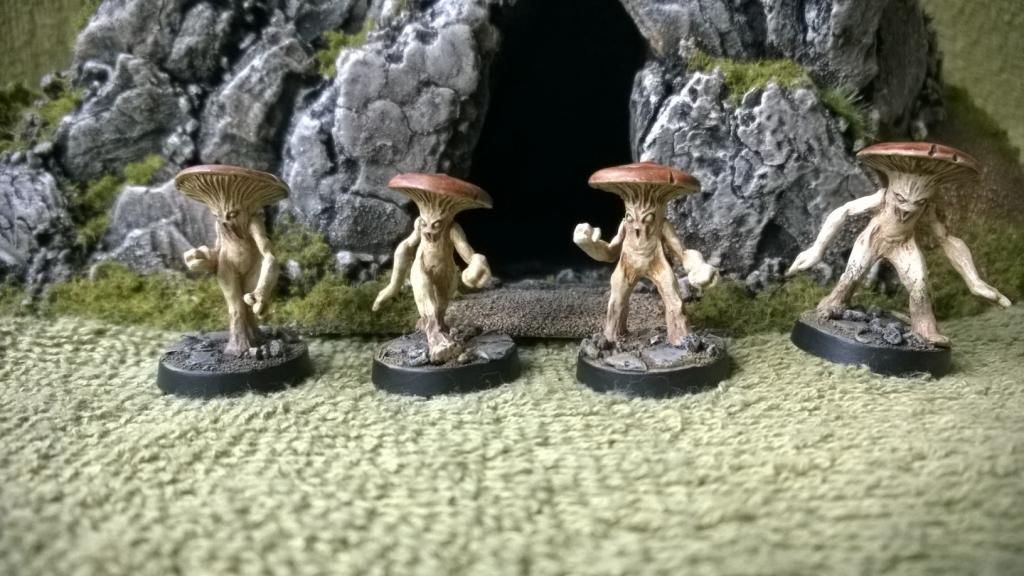
So, I did 'Shrooms:


 "Among adventurers, there are stories about mushroom men sometimes found in the more damp sorts of dungeons and caves. Those who hear these tales for the first time, often scoff at these accounts. When you spend your days fighting the likes of Orcs, Ratmen and even worse horrors in the dark below the earth, how could you worry about something as feeble and fragile as mushrooms, they ask?
Do not begrudge them their doubts, my friend. They, unlike those who live near caverns infested in such a manner, have not spent night after night hidden in their homes as these creatures scrabble at the doors and windows, their eerie, sighing cries sounding in the night. They have not seen the fate of those who breathe their spores, lost loved ones to it.
Those who have know the truth; ancient man did not start eating mushrooms for their taste, or for nutritional value, but for revenge..."
From the accounts of Tobias Wärmduscher, widower and former Truffel-gatherer.

The models are the Agarix from the ever-wonderful Hasslefree Miniatures.
They painted up remarkably easily, using mostly Vallejo Paints and GW Washes.
I've basecoated them in Vallejo Medium Flesh and drybrushed them all over in, consecutively;Vallejo Iraqui Sand, Vallejo Pale Sand and finally Vallejo Flat Aluminium.
Then I washed them with GW Seraphim Sepia, thinned about 50% with water. While this was still wet, I added spot washes in GW Devlan Mud on their lower legs, face and the ribs under their cap. Because both washes were still wet, they blended nicely into each other.
I tinted their caps with a number of glazes with GW Ogryn Flesh wash, with an occasional layer of GW Seraphim Sepia in there as well.
Finally the eyes were dotted with Vallejo Green Sky.

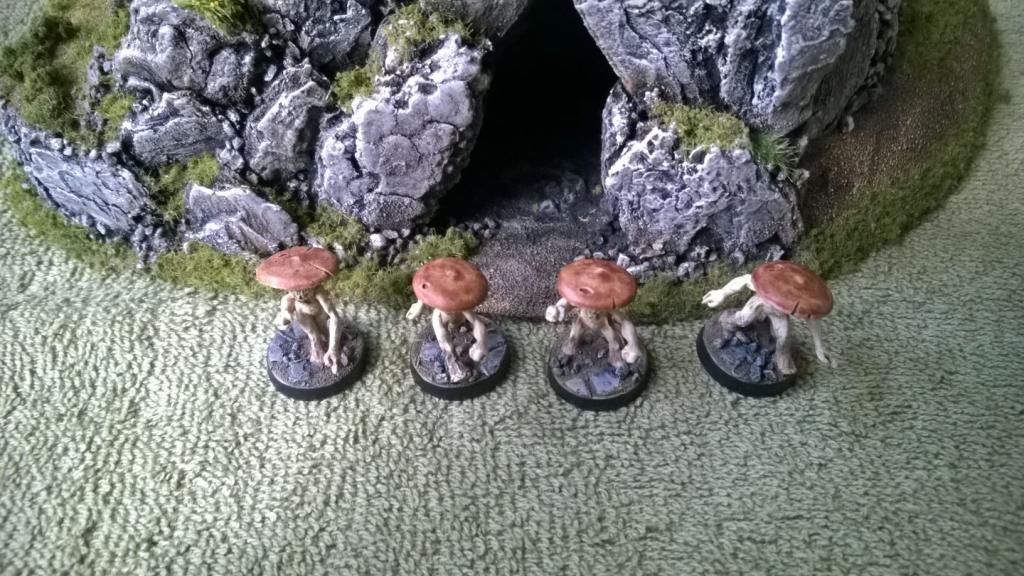
The stone parts of their bases are drybrushed with GW Charandon Granite and GW Dheneb Stone, the dirt parts are painted with Vallejo Burnt Umber and drybrushed Vallejo German Camouflage Ochre.

Here they are in a neat line:


Until next time!

maandag 19 mei 2014

Tinctures and Metals, Charges and Blazons...

Or, in other words, the stuff of heraldry!

If you're painting knights you can't get around it. To make my life easier when designing heraldry for my knights, I made a little colouring-book style sheet to work out how designs for heraldry would work. Not only on the shield, but also on the horse's caparison or in the livery of a knight's retinue. I didn't want to discover halfway through painting that a certain combo or design didn't work out after all. I'd rather waste 10 minutes and some paper, than spend hours on a miniature and having to strip it...
I mentioned this sheet on the LAF and offered to scan it.
So I thought I might as well put it up here.

Here is the design sheet I use:
(Sadly, scanning it has washed out the lower right area a fair bit.)

This is the one that I used in deciding on a colour scheme for my recently painted knight and retinue:
Like I said, colouring-book style...

If you need a primer on how to design heraldry, this one seems pretty complete and thorough: www.internationalheraldry.com

zaterdag 21 januari 2012

How I made the Brigand

I've had several requests to describe in more detail how I made the Brigand and Devastator in 1/72nd scale.
I'll start with explaining the Brigand. Sadly this will be a how-to without pictures: I've already built both Brigands I intend to build for the time being.
When/If I ever "need" to build a 3rd or 4th Brigand I'll update this how-to with pictures.

What you will need:
-1 Model of an F1U Corsair in 1/72nd scale. (I used an old Revell one, kit # 04112. It's an old, clunky kit with raised panel lines, but it was cheap....) Note: To save you some plasticard work, try to find a kit that has the rudder in two halves as part of the fuselage halves.
-.020"/.5mm and .040"/1mm plasticard. 
-A pair of small (2x1mm) rare earth disc magnets, if you want to magnetize the prop (which makes it harder to damage: to much force and it simply pops loose instead of bending/breaking)
-2.5 and 3.2 mm plastic rod/tube (for the guns)
-A spare canopy for the turret (fairly small, early Spitfire or Hurricane should do).
-Suitable bits to make the payload from.(In my case: a small bomb that came with the Corsair kit, 2 Nebelwerfer shells and 2 1/35 PaK shells...) 
-Something to make the prop spinner from (I used a part I cut from the drop-tank the Revell Corsair comes with.)
-Your usual model building tools


How to build it: 

Step 1: The fuselage:
Glue the two fuselage halves together per the kit's instructions but be careful not to glue the two halves of the rudder together.

If the instructions require you to assemble and glue the cockpit inside the fuselage at this stage, do so.


Step 2: Shortening the fuselage:
Just before the point where the rudder starts to rise from the fuselage, there should be a panel line. 
Use this panel line as a guide to saw the last part of the tail from the fuselage. Check that the two parts of the rudder are still separate and put the sawn-off part aside. 
Glue a plate of plasticard over the resulting hole, file flush with the fuselage.


Step 3: Turret:
Onto the plasticard plate you just glued on, build a turret to fit the spare canopy you have.
Use lengths of the 2.5mm plastic rod/tube to represent the .30 cal guns in the turret.
(Sorry, I can't give any more precise instructions on this. I always eyeball/improvise this step....)


Step 4: Building the tail rudders:
Trim and glue the elevators together into one plane (join them where they usually connect to the fuselage). Make sure the outside edge is straight, this is where you will attack the rudders/winglets.
Separate (saw or cut) the pieces of rudder apart from the stump of the tail you cut off in the second step. Saw off the lower 1/4th of them, save these pieces. Use the upper 3/4ths to make the rudder/winglets. 
Glue the lower quarter together, use these as the pylon that connects the plane of the joined elevator to the hull. Glue this assembly to the hull.


Step 5: The wings:
Assemble the wings, as per the kit's instructions. Wheels up or down? You decide.
Leave off any guns. Do not attach the wings to the fuselage yet.
Check the panel lines on the wing's upper surface. There should be a large panel over the guns, with two rows of 3 rectangular panels to the outside of these. Use the panel line that separates these two rows of 3 rectangles as a cutting guide and saw through the wings at this point. Your cutting line should run from leading to trailing edge. Make sure this cut is neat! You will be joining the wings back together along this cut later.
From the 1mm/.040" plasticard, cut the two directional stabilisers that intersect the wing.
You can use the hastily drawn and guesstimated template I used (see below) or improvise one yourself. ;-)
Glue the wings back together, with these stabilisers in between. Make sure the wings line back up.
Use the 3.2mm plastic rod/tube to make the .50 cals in the wings, 2 per wing. Glue one in the location where the centre of the 3 original wing guns were. Glue the second one at the bend in the wing. Pin these if you like them sturdy.


Step 6: The cowling and prop
Assemble the engine cowling (if a separate part from the fuselage) and magnetize the prop (one magnet in the prop, one magnet in the cowling/engine, where the prop axle would be. Watch your polarities!). Make and fit the spinner on the prop.
Next, cut a piece of .020" plasticard, as wide as the cowling is deep and long enough to wrap around it exactly once. Glue this around the cowling.
Plunk the prop in place.
Cut two pieces of .020" plasticard, wide enough to overlap the previous piece by a few mm front and read and each wide enough to completely wrap around the previous. Laminate these around the cowling, make sure the prop, when in place, just clears the front edge of these by a mm or so. Keep their curve as neat a possible.
Neaten up their front and rear edge and round of the edges. 
And there it is, your nice butch Brigand engine cowling.


Step 7: Final assembly:
Glue the cowling and wings onto the fuselage. Put in the fittings for the flying stand you want to use. Glue on the cockpit if you want to paint it solid, if not, leave it off until after painting. Fit underwing ordnance.
Make the retractable Zep-gear:
Take the hatches for the retractable tail wheel. Thin these down a bit, if they are thick pieces (they are on the Revell kit). Glue them onto the upper fuselage, between the cockpit and the turret, wide end towards the front, narrow end towards the rear. If needed, file them to be thinner still and match the curve of the upper fuselage. Take bit of putty/plasticard to fill the hole where the tail wheel would normally stick out between the hatches.


Step 8: Finished!
Sit back, smile, admire your handiwork...
(You're allowed to move it around and make flying noises at this point. I know I did....)


Step 9: Paint her up!
What colours? It's your plane, you decide!
Once painted, repeat step 8 to taste. ;-D

The Devastator will follow when I build the second one. To be totally honest though, I'm not a 100% satisfied with the way I built the first Devastator: It does the job and recognizable as a Dev. But, the lines of the fuselage are a bit off, and the forward view from the cockpit is a obstructed.  I may need to rethink that one, with a different plane to base the fuselage on.
We'll see.