<Insert obligatory Post-Apocalypse quip here>
I had some spare moments to do a bit more on the two Landmates today. The Bunny Ears are now reality:
And, as you can see, I've built the frame for the two grenade packs (one is on the table, the other attached to the left Landmate's back), as well as the first set of launcher barrels. On the right of the picture is the pack I originally built for my first Landmate conversion.
I don't have the exact same parts I used last time, most importantly the discs that the barrels should mount on. So I'll need to find an alternate way of doing those, but that shouldn't be a problem.
Oh, and I've done a (solo) playtest of an idea I had for minifig-scaled infantry in Mobile Frame Zero yesterday.
My basic idea was this:
-Each 2 infantry count as a single Frame and they split the dice between them. As such, each infantry in the pair gets 1 white die, and 1 die from every 2-die system (mainly weapons) you choose for the infantry pair. Single die systems (Defense, Sensors) you allocate to one of the pair. (So, if you want both to be armoured, you need to take two Defense systems...)
-To counter the fact infantry only has a single white die (and so often has to choose between moving or defense), I ruled that infantry can't be spotted.
-Infantry activates in pairs (not necessarily the pair you created as a single frame, you can mix as you want during the game).
-It takes 2 infantry to claim an objective.
I played two games, one with both sides having equal numbers of Frames and Infantry, and a small difference in the number and type of systems. The second I played with one side consisting of 2 Frames and the other of 4 infantry to see how they balanced with each other. Let's just say the Frames took a beating in that second game...
Things I ran in to:
-The paired activation results in potentially confusing activation sequences if an infantry pair both target different Frames. Which Frame is forced into activation?
-2 Infantry appear to be more powerful than a single frame, simply because they get to use a larger portion of the dice you roll. And, because of the no-spotting, they can have turn in which they are effectively invulnerable (due to Defense 6).
I'm thinking of ditching the no-spotting rule and seeing how that goes as far as redressing balance.
Also, I'm not happy with infantry lacking ranged weapons suddenly turning into jetpack infantry through gaining a bonus green D8. I may need to knock the bonus movement die down to D6 for infantry.
Now if you'll excuse me, the zombies have closed in again and I need to fight them off. ;-P
zaterdag 22 december 2012
woensdag 19 december 2012
Do you like messy workbench pics?
...
You don't?
...
Well, you're getting them anyway! :D
Like I said in last post, those Mobile Frame Zero rules had me thinking about my Appleseed conversions again.
I had this duo lying around since at least 2009. They're two Infinity Yu Jing Guijia that I'm converting in police issue/ESWAT Guges Landmates. One was mostly finished, the other was just sawn apart in preparation for the conversion. The above pic shows where they are at today. To get them ready for primer, I "just" need to add the "bunny ear" antenna to their back, and build them their back-mounted grenade packs.
The conversion already done on them consists of the following:
-Arms cut apart at the elbow, to lengthen the upper arm and repose them.
-Sword and fingers of the left hand removed, replacement hand sculpted to hold the gun.
-Head replaced with a plasticard and greenstuff custom sculpt.
-Master arms (from GW Space Marines) added to their torso.
-Magnets mounted in the shoulder bulges (for "bunny ear" sensors) and in their back (for the grenade launcher)
They will be joining this lot:
That's a prototype Guges in the front, next to Briareos and Deunan (who will, most likely be piloting the prototype... I don't have a Landmate for Briareos yet.). In the back are three terrorist/foreign power Landmates, an officer model in the middle, flanked by two troopers.
Oh, here are a couple of pics of how (once made) the "bunny ears" and grenade pack will fit on the police/ESWAT Guges:
I'm not sure when this lot will see paint...
If I can't get them finished over the holidays, they'll most likely have to wait 6 months or more to be completed, as I'll be away from home during the weekdays the first half of the coming year. Which means weekends will be friends and family time, instead of loner-hobby-time. ;-P
Have a good holiday season, all!
You don't?
...
Well, you're getting them anyway! :D
Like I said in last post, those Mobile Frame Zero rules had me thinking about my Appleseed conversions again.
I had this duo lying around since at least 2009. They're two Infinity Yu Jing Guijia that I'm converting in police issue/ESWAT Guges Landmates. One was mostly finished, the other was just sawn apart in preparation for the conversion. The above pic shows where they are at today. To get them ready for primer, I "just" need to add the "bunny ear" antenna to their back, and build them their back-mounted grenade packs.
The conversion already done on them consists of the following:
-Arms cut apart at the elbow, to lengthen the upper arm and repose them.
-Sword and fingers of the left hand removed, replacement hand sculpted to hold the gun.
-Head replaced with a plasticard and greenstuff custom sculpt.
-Master arms (from GW Space Marines) added to their torso.
-Magnets mounted in the shoulder bulges (for "bunny ear" sensors) and in their back (for the grenade launcher)
They will be joining this lot:
That's a prototype Guges in the front, next to Briareos and Deunan (who will, most likely be piloting the prototype... I don't have a Landmate for Briareos yet.). In the back are three terrorist/foreign power Landmates, an officer model in the middle, flanked by two troopers.
Oh, here are a couple of pics of how (once made) the "bunny ears" and grenade pack will fit on the police/ESWAT Guges:
I'm not sure when this lot will see paint...
If I can't get them finished over the holidays, they'll most likely have to wait 6 months or more to be completed, as I'll be away from home during the weekdays the first half of the coming year. Which means weekends will be friends and family time, instead of loner-hobby-time. ;-P
Have a good holiday season, all!
vrijdag 14 december 2012
Studs...
Real life has been taking precedence quite a bit lately...
I've been looking at my Warmachine again, but have yet to seriously start work on them.
However, earlier this week I stumbled across something called Mobile Frame Zero and my interest was piqued.
Big stompy robots, Lego's and wargaming rolled into one? I had to check this out.
So I took out the family Lego stockpile (I'm lucky, all three of us love the stuff!) and started building some bots, called Frames in the game.
I took the instructions for building the "Chub" Frame, and improvised where I couldn't find matching parts.
Here's what I built:
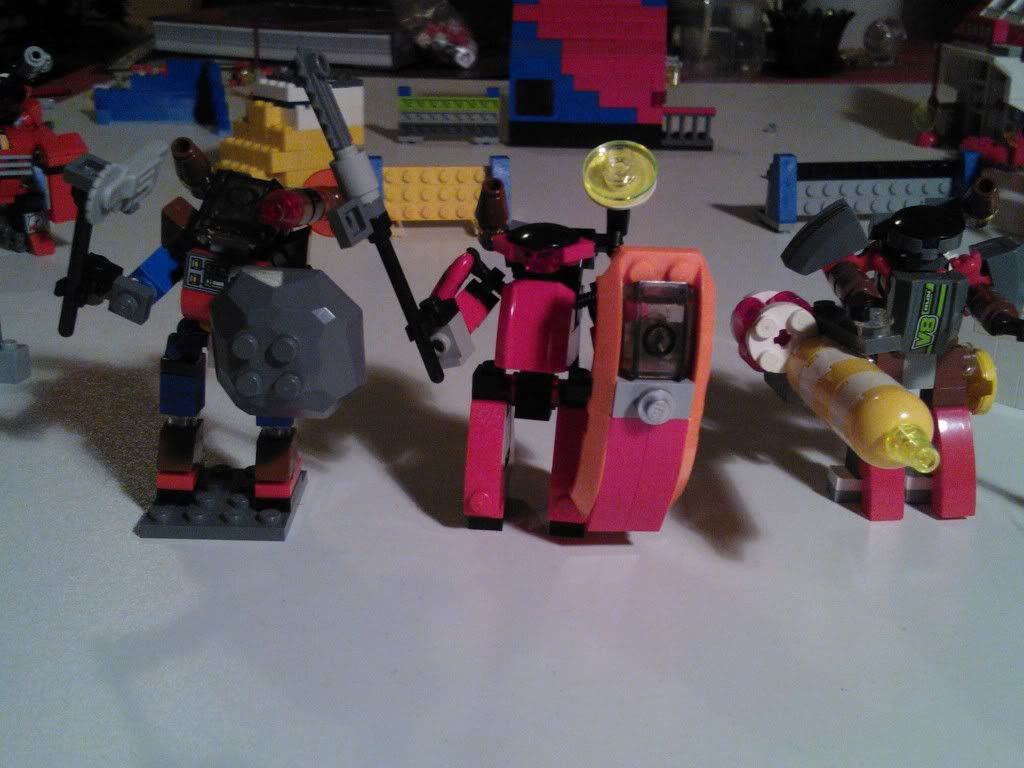
A Free Peoples force*, consisting of an Officer and two troopers, the latter using militarised construction bots.
The Authority* strike force, again, an officer in the middle, flanked by two troopers.
The next day, I built some filthy mercenaries*. (I was out of co-ordinated colours, and just bashed these together with whatever came to hand...) amd bashed some rudimentary scenery together.
I built all three groups with similar equipment: one heavily armoured officer, with a both melee and ranged weapons, an all-round soldier with some armour (the shield), a melee and a ranged weapon plus a "heavy" trooper with an artillery piece and spotting gear (only the merc heavy got extra armour instead of spotting gear).
(During the test games, giving the artillerist spotting gear turned out to be less than optimal, as sensors are medium range, but the artillery is long range only....)
*: I must admit I didn't read the game's accompanying setting background, but just built and named as I felt like.
These similar load outs caused some fudging when I ran some solo test games, as the rules work on the premise of the various parties not being equally matched... :P
The rules are quick, and once you get your head around them (the rules are very concise, and I feel they could be more elaborately explained to be more readily grasped.) surprisingly fun.
They work based on dice pools of sorts: Each Frame gets 2 generic dice that can be used for anything, plus each extra system installed (additional movement, defensive measures, sensors, etc.) gives you a number of extra dice for specific purposes. Damage is expressed in lost systems and corresponding loss of dice.
Which is extra fun with Legos because you get to physically rip the destroyed system from the little robot!
You can even damage terrain! (Isn't Lego's brilliant?) By the end of the game, your table will be littered with loose bricks and bits of robots, really showing off the mayhem that occurred.
I found I really like the way they handle turn order in this game.
As I mentioned earlier the game relies on asymmetry between forces. It features here, in turn order, as well as the role you play in the game (defensive or offensive). Essentially, the number of Frames and systems each player has are calculated into a score. The stronger your force, the lower your score.
Getting the highest score means you will fight as the defender, allowing you to start the game in an advantageous position. You also get to go first and take the initiative each turn. Loosing Frames or objectives costs you points, capturing enemy objectives gains you points. The highest score at the end of the game wins.
So the weakest party also get a leg up towards victory by starting higher up the ladder. Really nice.
The high level of integration of this system into the game seems to make it less flexible with regards to playing scenarios, but I don't have enough experience with the rules yet to judge this, I could be mistaken on this point.
Though the rules are written with Lego's in mind, they could be very easily adapted to any kind of fast paced Mecha warfare such as Gundam. You just need to adapt the measurement stick to the size of the models you're using. Once grasped, the rules are easy to explain, so I expect they would do well as a participation game on conventions too.
They've certainly got me thinking again about some Appleseed conversions I was working on a few years ago. :)
So, in conclusion, if you have a stack of Lego or a collection of Mecha kits gathering dust I can heartily recommend these rules!
As a farewell, a pic from the opening stage of a test game I played with my 8 year old son:
I've been looking at my Warmachine again, but have yet to seriously start work on them.
However, earlier this week I stumbled across something called Mobile Frame Zero and my interest was piqued.
Big stompy robots, Lego's and wargaming rolled into one? I had to check this out.
So I took out the family Lego stockpile (I'm lucky, all three of us love the stuff!) and started building some bots, called Frames in the game.
I took the instructions for building the "Chub" Frame, and improvised where I couldn't find matching parts.
Here's what I built:
A Free Peoples force*, consisting of an Officer and two troopers, the latter using militarised construction bots.
The Authority* strike force, again, an officer in the middle, flanked by two troopers.
The next day, I built some filthy mercenaries*. (I was out of co-ordinated colours, and just bashed these together with whatever came to hand...) amd bashed some rudimentary scenery together.
I built all three groups with similar equipment: one heavily armoured officer, with a both melee and ranged weapons, an all-round soldier with some armour (the shield), a melee and a ranged weapon plus a "heavy" trooper with an artillery piece and spotting gear (only the merc heavy got extra armour instead of spotting gear).
(During the test games, giving the artillerist spotting gear turned out to be less than optimal, as sensors are medium range, but the artillery is long range only....)
*: I must admit I didn't read the game's accompanying setting background, but just built and named as I felt like.
These similar load outs caused some fudging when I ran some solo test games, as the rules work on the premise of the various parties not being equally matched... :P
The rules are quick, and once you get your head around them (the rules are very concise, and I feel they could be more elaborately explained to be more readily grasped.) surprisingly fun.
They work based on dice pools of sorts: Each Frame gets 2 generic dice that can be used for anything, plus each extra system installed (additional movement, defensive measures, sensors, etc.) gives you a number of extra dice for specific purposes. Damage is expressed in lost systems and corresponding loss of dice.
Which is extra fun with Legos because you get to physically rip the destroyed system from the little robot!
You can even damage terrain! (Isn't Lego's brilliant?) By the end of the game, your table will be littered with loose bricks and bits of robots, really showing off the mayhem that occurred.
I found I really like the way they handle turn order in this game.
As I mentioned earlier the game relies on asymmetry between forces. It features here, in turn order, as well as the role you play in the game (defensive or offensive). Essentially, the number of Frames and systems each player has are calculated into a score. The stronger your force, the lower your score.
Getting the highest score means you will fight as the defender, allowing you to start the game in an advantageous position. You also get to go first and take the initiative each turn. Loosing Frames or objectives costs you points, capturing enemy objectives gains you points. The highest score at the end of the game wins.
So the weakest party also get a leg up towards victory by starting higher up the ladder. Really nice.
The high level of integration of this system into the game seems to make it less flexible with regards to playing scenarios, but I don't have enough experience with the rules yet to judge this, I could be mistaken on this point.
Though the rules are written with Lego's in mind, they could be very easily adapted to any kind of fast paced Mecha warfare such as Gundam. You just need to adapt the measurement stick to the size of the models you're using. Once grasped, the rules are easy to explain, so I expect they would do well as a participation game on conventions too.
They've certainly got me thinking again about some Appleseed conversions I was working on a few years ago. :)
So, in conclusion, if you have a stack of Lego or a collection of Mecha kits gathering dust I can heartily recommend these rules!
As a farewell, a pic from the opening stage of a test game I played with my 8 year old son:
woensdag 28 november 2012
Long overdue update
Hi Folks,
It's been a quiet time, hobbywise, for me lately.
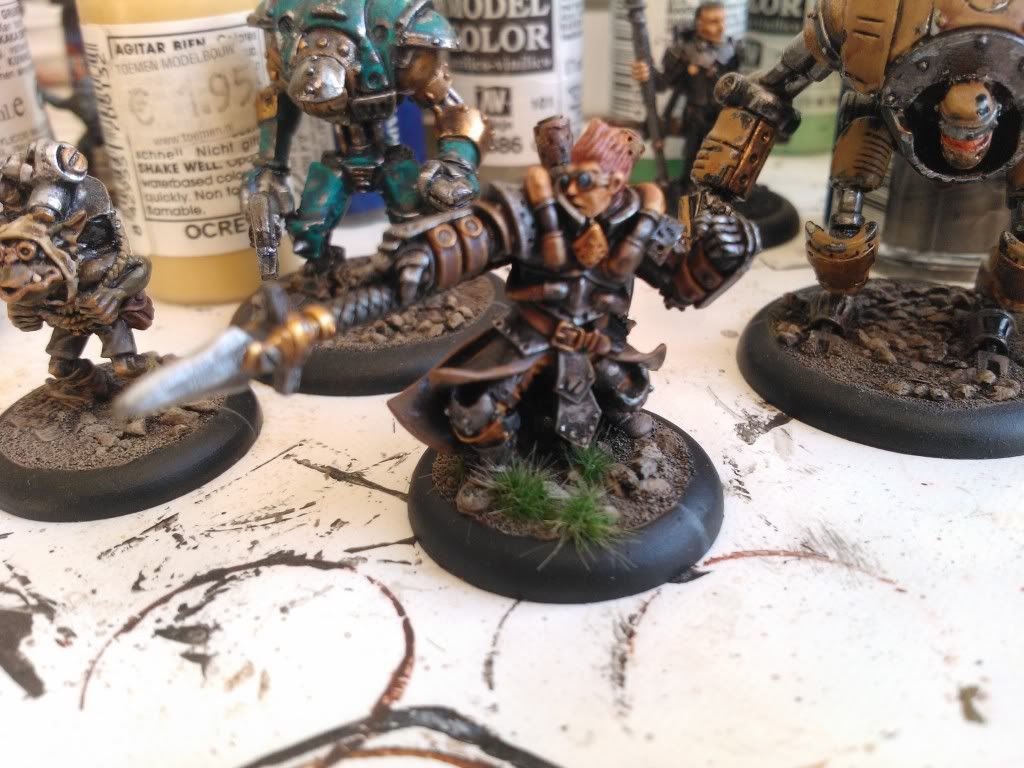
I've been to Crisis 2012 (Lovely show, much improved by the new venue!), bought and read the new Iron Kingdoms RPG book (will need to play it to really evaluate it, it's so different from what has come before), assembled a few 4Ground wagons and carts (nice kits!) and I've painted this guy:
It's the rogue Warcaster from the Iron Kingdoms RPG line of miniatures.
I had some difficulty choosing a colour scheme for him, so I just settled on bare metal armour...
All other pics refused to be in focus, so no view of his behind, sorry.
The figures behind him are a pair of converted laborjacks that I made well before I started this blog. Plus a Gobber mechanik. In the background is lurking a barely started Arcane Mechanik (from the Iron Kingdoms miniatures line as well).
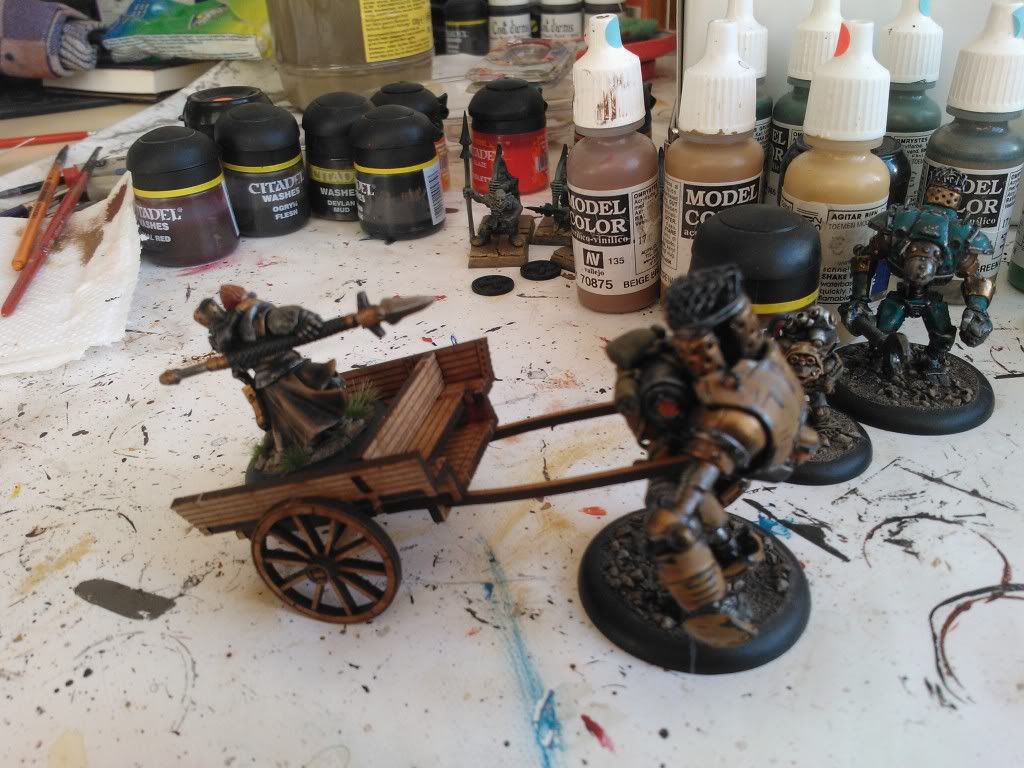
Okay, then, one more picture, because I've kept you waiting so long:
The one and only Warcaster Charioteer! :-D
It's been a quiet time, hobbywise, for me lately.
I've been to Crisis 2012 (Lovely show, much improved by the new venue!), bought and read the new Iron Kingdoms RPG book (will need to play it to really evaluate it, it's so different from what has come before), assembled a few 4Ground wagons and carts (nice kits!) and I've painted this guy:
It's the rogue Warcaster from the Iron Kingdoms RPG line of miniatures.
I had some difficulty choosing a colour scheme for him, so I just settled on bare metal armour...
All other pics refused to be in focus, so no view of his behind, sorry.
The figures behind him are a pair of converted laborjacks that I made well before I started this blog. Plus a Gobber mechanik. In the background is lurking a barely started Arcane Mechanik (from the Iron Kingdoms miniatures line as well).
Okay, then, one more picture, because I've kept you waiting so long:
The one and only Warcaster Charioteer! :-D
woensdag 3 oktober 2012
Run Miss Muffet, RUN!
Well, it turns out it wasn't the second batch of Orc or Wolf I ended up painting....
Light was problematic again, so two pics, one under natural light (in the shade, it was suddenly sunny) and one with flash:
I tried to give the spiders a natural seeming patterning on their abdomen, but sadly it just turns out as mottling to the eye. Still looks rather nice though...
As a nod to the old WHQ art, I did two spiders with a skull patterning on their abdomen, did you spot them?
Light was problematic again, so two pics, one under natural light (in the shade, it was suddenly sunny) and one with flash:
I tried to give the spiders a natural seeming patterning on their abdomen, but sadly it just turns out as mottling to the eye. Still looks rather nice though...
As a nod to the old WHQ art, I did two spiders with a skull patterning on their abdomen, did you spot them?
donderdag 20 september 2012
Done with the Orcs!
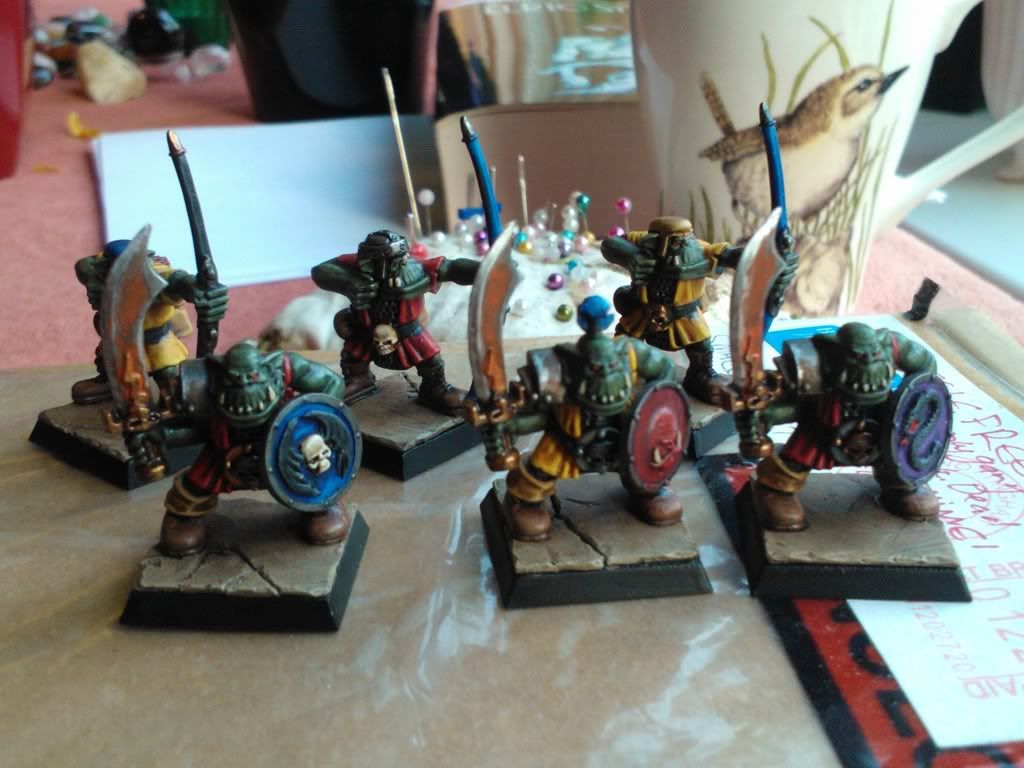
They're finished!
A quick snap:
As it was already evening, I had to quickly find the place in the house that still had the best light...
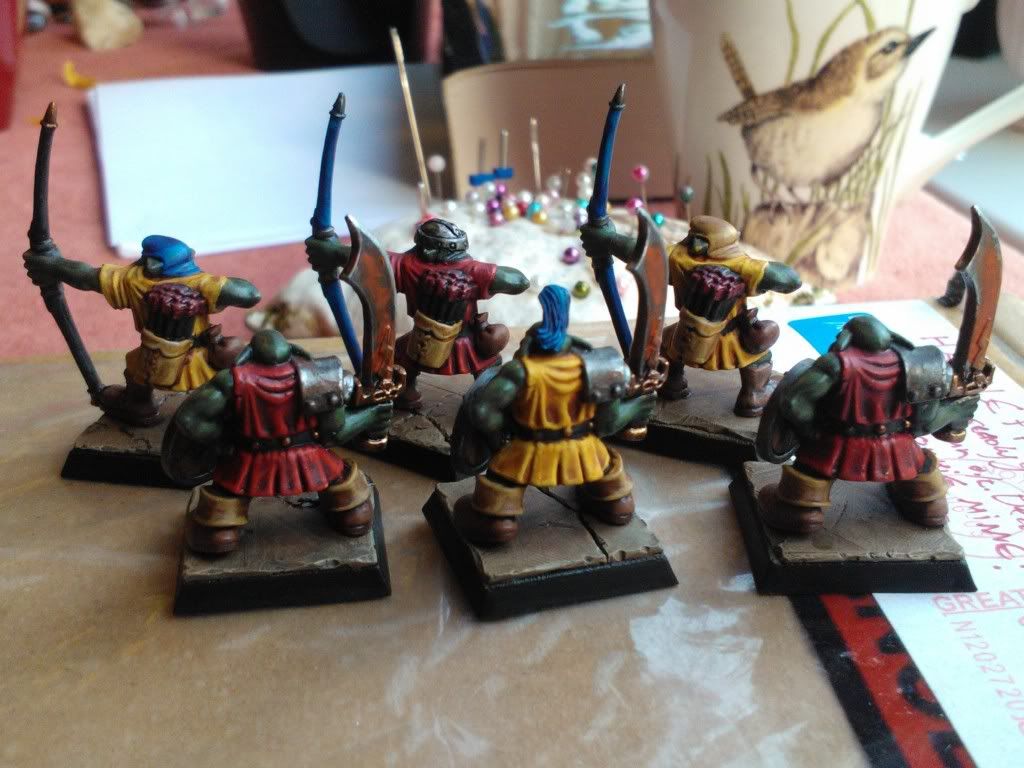
After hesitating a bit on wether or not to add gore to the blades, and a suggestion on a forum to make the blades rusty instead, I ran the decision by the misses (after all, they're her figures in the end).
She decided she wanted them rusty. So rusty it was.
The rust was a new thing for me, never done that before. I'll need to take a fresh look in the morning, to see if I'm fully satisfied with this attempt, or if it may need some tweaking. (I have a vague feeling the blades may be far too rusty compared to the rest of their kit. But I need to take some distance first, been staring at them too hard the last hour or so.)
A quick snap:
As it was already evening, I had to quickly find the place in the house that still had the best light...
After hesitating a bit on wether or not to add gore to the blades, and a suggestion on a forum to make the blades rusty instead, I ran the decision by the misses (after all, they're her figures in the end).
She decided she wanted them rusty. So rusty it was.
The rust was a new thing for me, never done that before. I'll need to take a fresh look in the morning, to see if I'm fully satisfied with this attempt, or if it may need some tweaking. (I have a vague feeling the blades may be far too rusty compared to the rest of their kit. But I need to take some distance first, been staring at them too hard the last hour or so.)
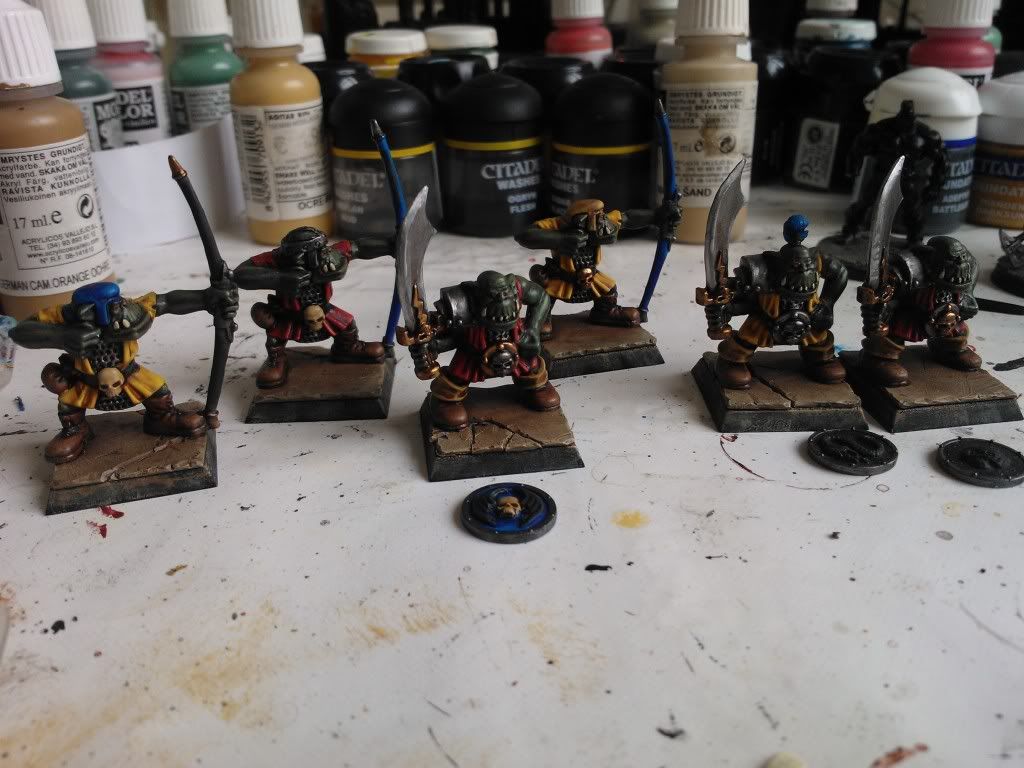
Quick snap...
...of the Orcs as they stand at this moment on the painting table:
The wash is drying on the skulls as I took this picture.
All that is left to do at this stage is: finish the skulls, the fletching on the arrows, and the two shields on the right. Once that is done, the base edge is painted (I always leave that for last) and they are done!
Then it's on to batch two of the big greenskins... But maybe I'll paint Wolf or another character first.
The wash is drying on the skulls as I took this picture.
All that is left to do at this stage is: finish the skulls, the fletching on the arrows, and the two shields on the right. Once that is done, the base edge is painted (I always leave that for last) and they are done!
Then it's on to batch two of the big greenskins... But maybe I'll paint Wolf or another character first.
Abonneren op:
Posts (Atom)