Wow, it's been a while, hasn't it?
Been in a bit of a hobby dip lately, I guess I let the insecurities and worries of unemployment get to me.
I've been doing some hobby stuff, but nothing I consider post-worthy:
-Done a little bit more on a larger scale sculpt of a Hellgate London Templar.
Not worth showing yet, it's basically the first ever scratch sculpt I'll be making. And it hasn't past the point of fleshing out basic anatomy. It's not even properly recognizable.... Basically just a project to try and teach myself some sculpting technique.
-Tried my hand at making waraji (Japanese sandals) using raffia and sisal twine instead of the traditional rice straw. I found it quite relaxing doing some simple manual work. It'll be a few more tries before I manage to braid something presentable/useable though...
As you can see, quite a massive body of work for a whole month, isn't it. ;-)
Hopefully next time I post, I'll actually have something done some hobby stuff to show you.

zaterdag 17 maart 2012
zaterdag 11 februari 2012
Brigand one, airworthy
Guess what? Paint happened!
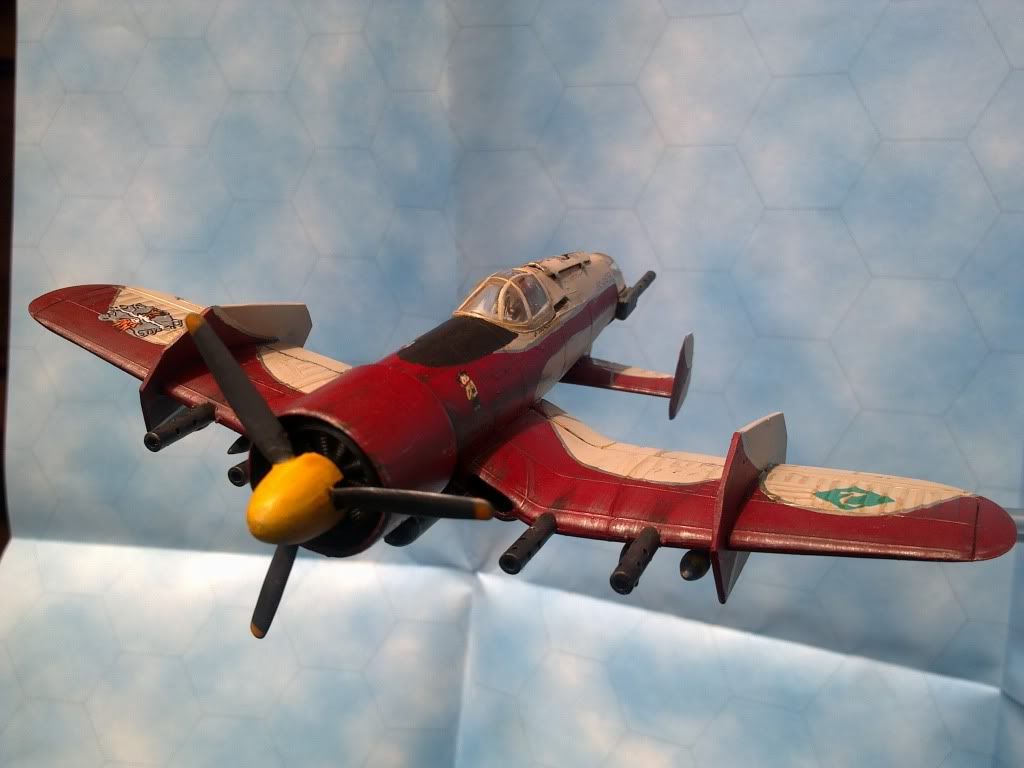
Here she is:
 I had the shading on the basecoat done last time, but stalled because I couldn't figure out unit markings I liked.
Because I've more or less chosen Hell, Michigan as the home field for this squadron, and the natives refer to themselves as "Hellions", I tried to find ideas by simply doing a Google image-search for that word...
And I lucked out! I found the logo for a roller derby team I could be "inspired by". ;-P
The logo (A fiery lady emerging from a cloud of smoke) looks cool, but is still non-specific enough to be explained in various ways.
Once that hurdle was taken, it was simply a matter of adding additional markings, colour coding the ordnance and add markings on the left wing to denote to which lead-wingman pair each plane belonged. This plane being the number 2 (wingman) of Green flight.
That being done, it was time to glue on the cockpit windows and start weathering.
The weathering itself is rather crude by serious modelling standards, but, hey, I'm a wargamer! I don't have the time or interest to endlessly faff about with filters, pigments and such to get everything just right...
Especially since the models will be used (hopefully intensively) and not get examined up close too often.
A few stains and streaks with washes, some drybrushing for various stains and wear and it's good enough for me...
Some more pics to gawk at:
Here she is:
Because I've more or less chosen Hell, Michigan as the home field for this squadron, and the natives refer to themselves as "Hellions", I tried to find ideas by simply doing a Google image-search for that word...
And I lucked out! I found the logo for a roller derby team I could be "inspired by". ;-P
 |
| Sorry, best pic I could take with the means at hand... |
Once that hurdle was taken, it was simply a matter of adding additional markings, colour coding the ordnance and add markings on the left wing to denote to which lead-wingman pair each plane belonged. This plane being the number 2 (wingman) of Green flight.
That being done, it was time to glue on the cockpit windows and start weathering.
The weathering itself is rather crude by serious modelling standards, but, hey, I'm a wargamer! I don't have the time or interest to endlessly faff about with filters, pigments and such to get everything just right...
Especially since the models will be used (hopefully intensively) and not get examined up close too often.
A few stains and streaks with washes, some drybrushing for various stains and wear and it's good enough for me...
Some more pics to gawk at:
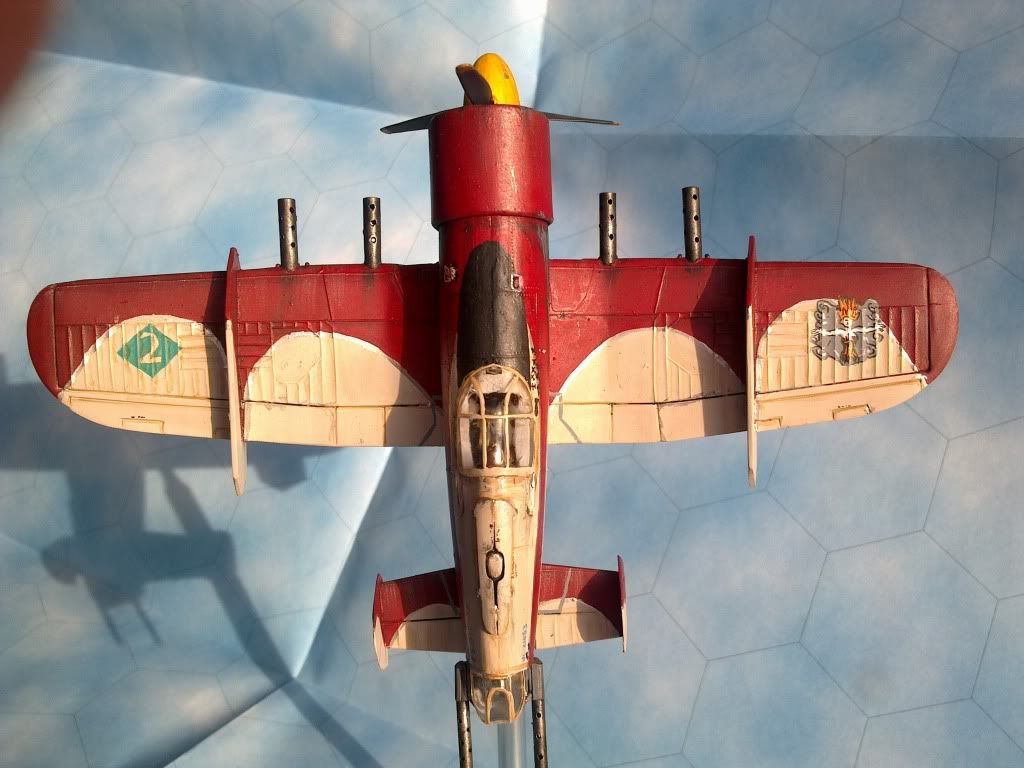 |
| Top view |
 | |
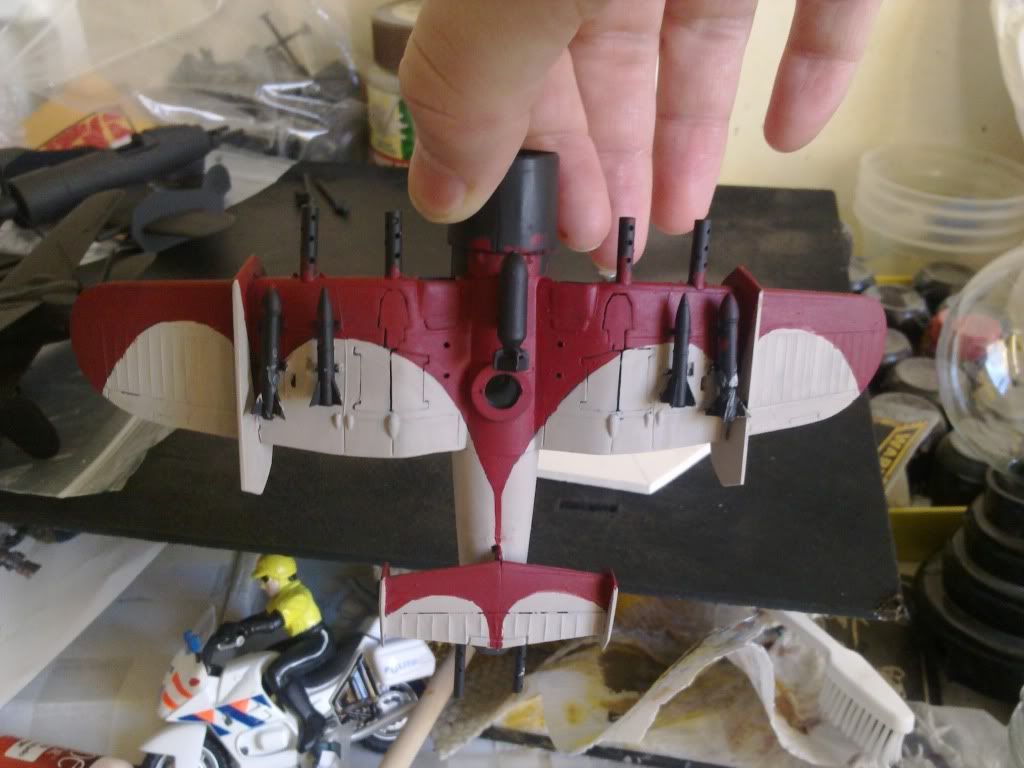
| And the bottom |
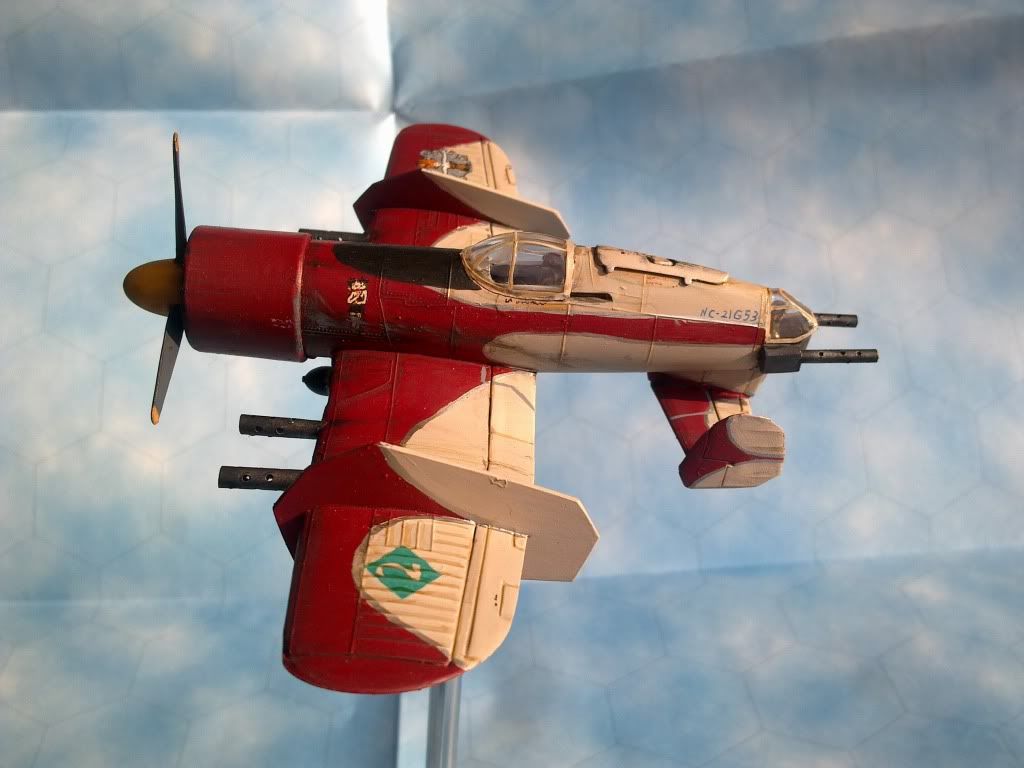 |
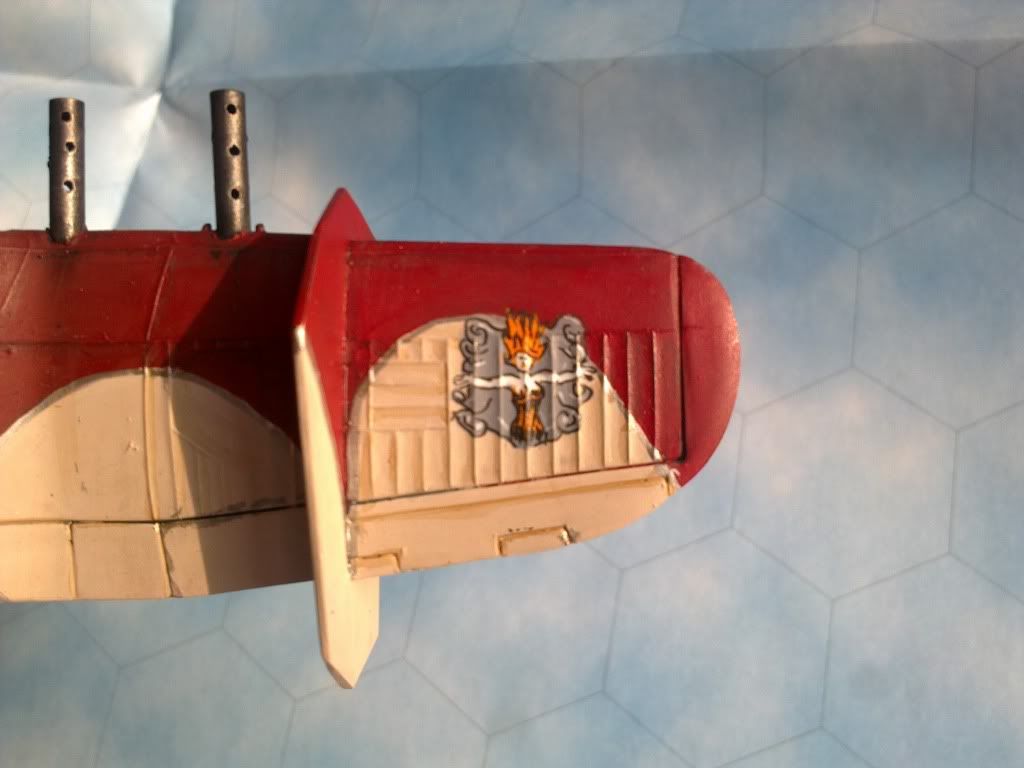
| You can just make out the nose art here. I decided not to the expected cheesecake (for this one...). |
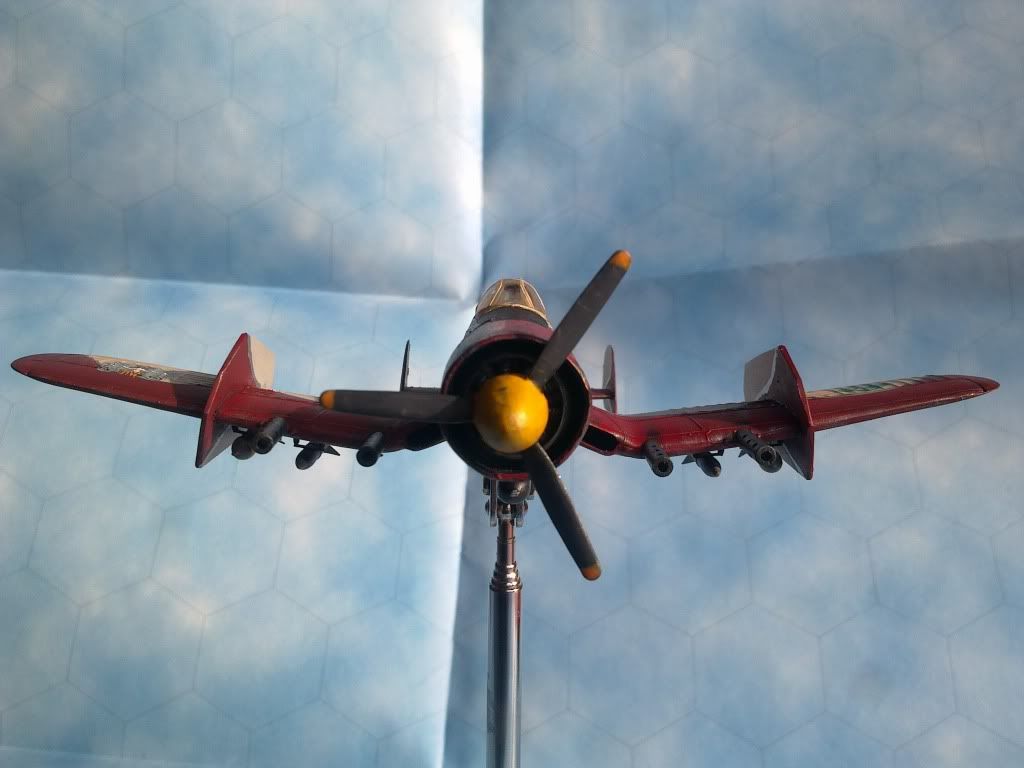 |
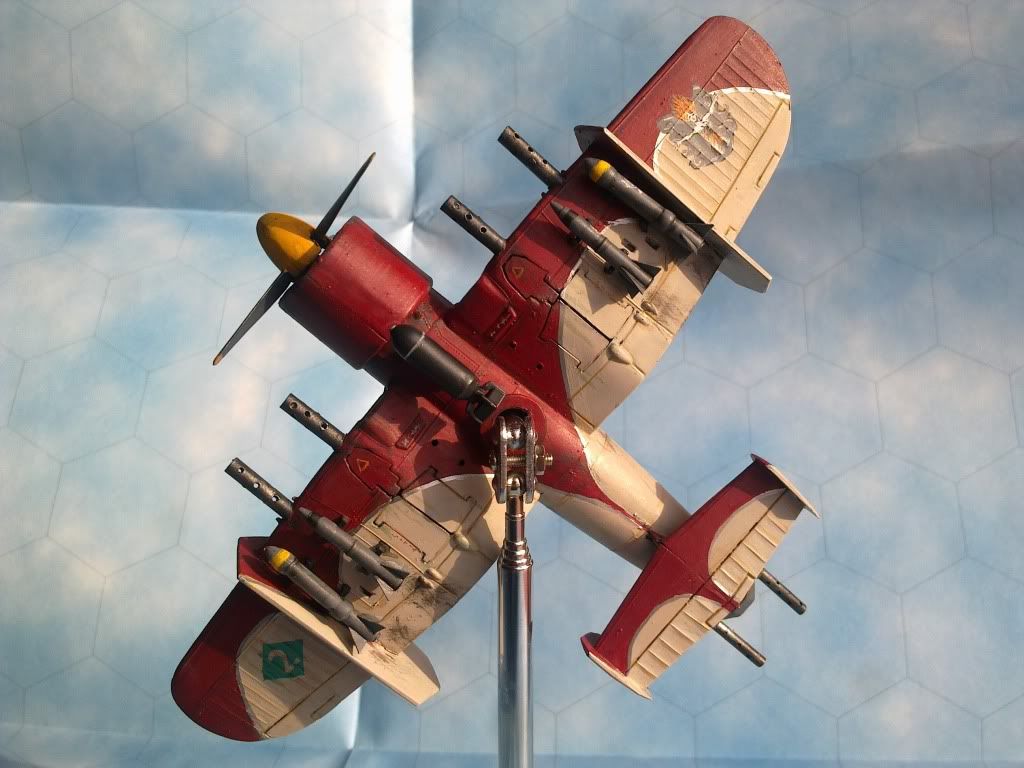
| NOT the view you want to have in a dogfight! |
zondag 5 februari 2012
Brigand one, basecoated
Got some time to do hobby stuff today...
Which means the first Brigand now has his primary colours basecoated!
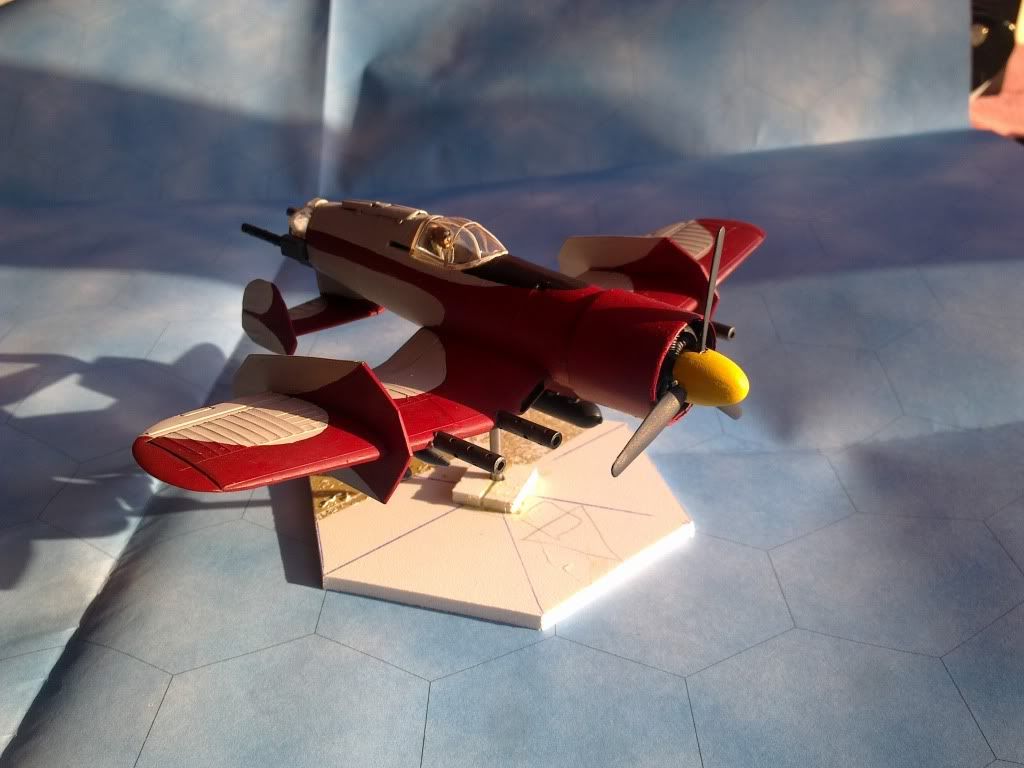
Here she is:

And a nice topside view:
 The cockpit and turret canopies are just dropped in place for this pic, they haven't been glued on yet.
Since taking these pics, I've added a quick silver pinstripe between the cream and the red sections of colour. And pretty orange tips for the prop. It makes her look just that little bit more "finished"...
But now I'm stuck until I decide on a squadron symbol and other markings...
I want to try putting some signs of use and wear on this plane, but for that, the markings need to be in place first.
Which means the first Brigand now has his primary colours basecoated!
Here she is:
And a nice topside view:

Since taking these pics, I've added a quick silver pinstripe between the cream and the red sections of colour. And pretty orange tips for the prop. It makes her look just that little bit more "finished"...
But now I'm stuck until I decide on a squadron symbol and other markings...
I want to try putting some signs of use and wear on this plane, but for that, the markings need to be in place first.
vrijdag 27 januari 2012
Friday Update
Work progresses on the first Brigand, be it rather slowly...
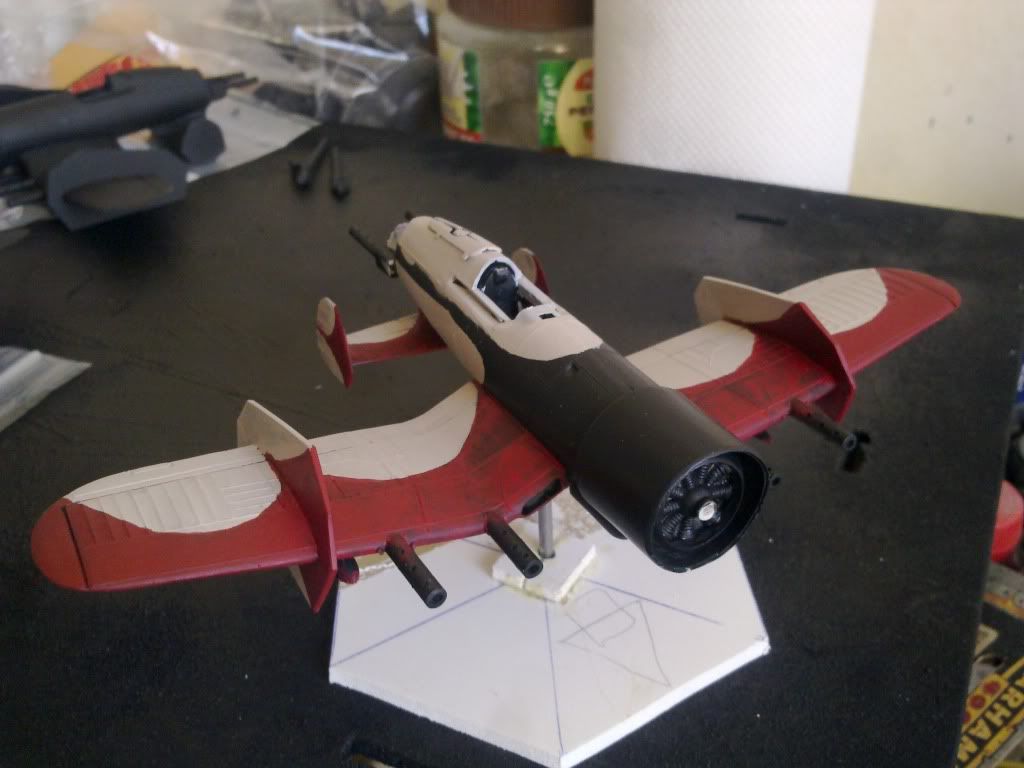
I spent some time hesitating about the colours to use. In the end I went with this:

 The black areas on the fuselage still needs to be painted red as well.
The red is slow going, as it needs lots of layers to get neat and even. After the main colours are done, I want to put a dividing line between the cream colour and the red, I'm considering either white, black or yellow?
I'm also thinking about putting a band of yellow and blue checkers on the engine cowling, for some nice contrast.
Markings and such I still need to decide on. There will be nose art though!
In addition, I spent the time the paint was drying to build this:
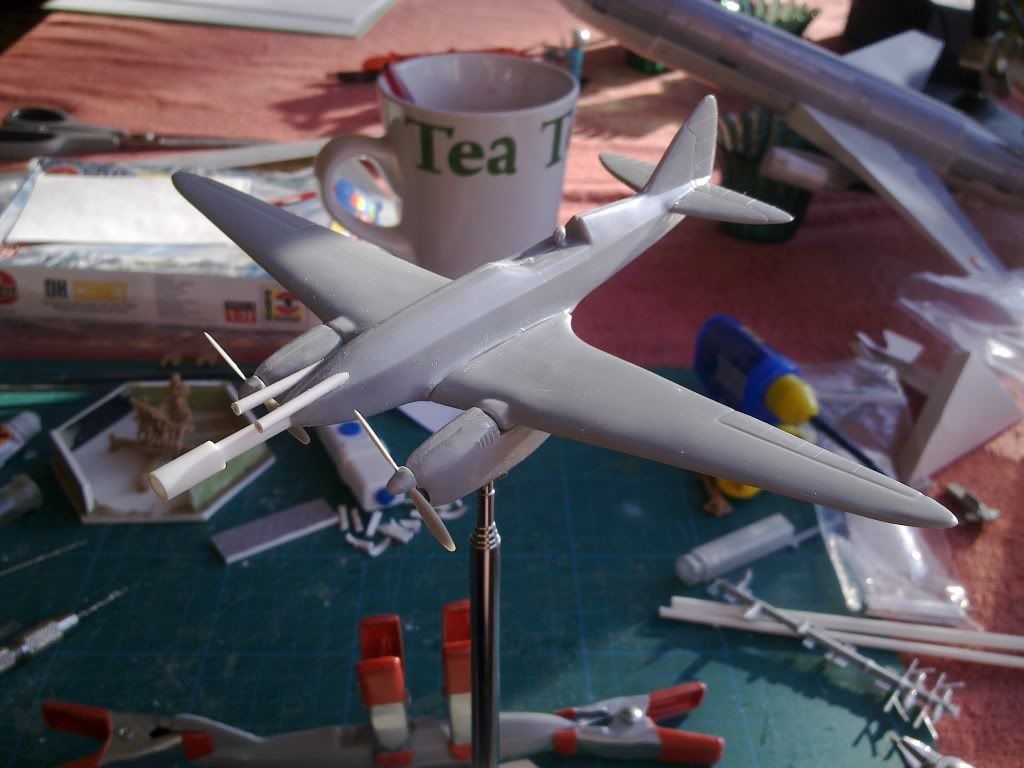
 A militarized version of the DeHavilland Comet racing plane!
High speed, low armour, a .70 and twin .30 in the nose....
The base kit was the old Airfix kit. Not the best of kits, but useful and affordable for this sort of thing.
(I noticed Airfix has released a 1/72nd DH Comet again. I really hope that it's a retooling. This kit really isn't up to par for this day and age anymore....)
The fuselage is too narrow to put a proper plug in. So I just settled for glueing a 6x1.5mm rare earth magnet underneath and just hoping for the best. The plane is light enough anyway.
Edit: just realised, I didn't mention:
The .70 on the comet was made by carefully filing back the nose of the Comet, until the flat plane had the same diameter as the plastic rod (3.2mm, same as I used for the .50s on the Brigand). File carefully, and alternate the direction in which you file, so that the flat plane stays at right angles to the centreline of the airplane.
I then cut a 2cm length of the 3.2mm rod and a 1cm length of tubing that fit precisely over the 3.2mm rod. I glued the 2cm long rod in place on the nose (You can pin this if you want).
Then I glued on the 1cm tube. I made sure only 2-3mm of it protruded beyond the end of the solid rod.This gives the illusion of a hollow barrel, but still makes it easy to paint the interior of the "hole" black.
The .30s were simply 2 to 2.5cm lengths of 2mm diameter plastic tube. I cut them off at an angle and then carefully filed them to match the curve and angle of the fuselage. Once the angle is correct, cut them to identical length and glue them in place.
I spent some time hesitating about the colours to use. In the end I went with this:
The red is slow going, as it needs lots of layers to get neat and even. After the main colours are done, I want to put a dividing line between the cream colour and the red, I'm considering either white, black or yellow?
I'm also thinking about putting a band of yellow and blue checkers on the engine cowling, for some nice contrast.
Markings and such I still need to decide on. There will be nose art though!
In addition, I spent the time the paint was drying to build this:
High speed, low armour, a .70 and twin .30 in the nose....
The base kit was the old Airfix kit. Not the best of kits, but useful and affordable for this sort of thing.
(I noticed Airfix has released a 1/72nd DH Comet again. I really hope that it's a retooling. This kit really isn't up to par for this day and age anymore....)
The fuselage is too narrow to put a proper plug in. So I just settled for glueing a 6x1.5mm rare earth magnet underneath and just hoping for the best. The plane is light enough anyway.
Edit: just realised, I didn't mention:
The .70 on the comet was made by carefully filing back the nose of the Comet, until the flat plane had the same diameter as the plastic rod (3.2mm, same as I used for the .50s on the Brigand). File carefully, and alternate the direction in which you file, so that the flat plane stays at right angles to the centreline of the airplane.
I then cut a 2cm length of the 3.2mm rod and a 1cm length of tubing that fit precisely over the 3.2mm rod. I glued the 2cm long rod in place on the nose (You can pin this if you want).
Then I glued on the 1cm tube. I made sure only 2-3mm of it protruded beyond the end of the solid rod.This gives the illusion of a hollow barrel, but still makes it easy to paint the interior of the "hole" black.
The .30s were simply 2 to 2.5cm lengths of 2mm diameter plastic tube. I cut them off at an angle and then carefully filed them to match the curve and angle of the fuselage. Once the angle is correct, cut them to identical length and glue them in place.
zondag 22 januari 2012
Sunday musings
Finished the Guntruck yesterday, but didn't have the light or the time to properly photograph it yet....
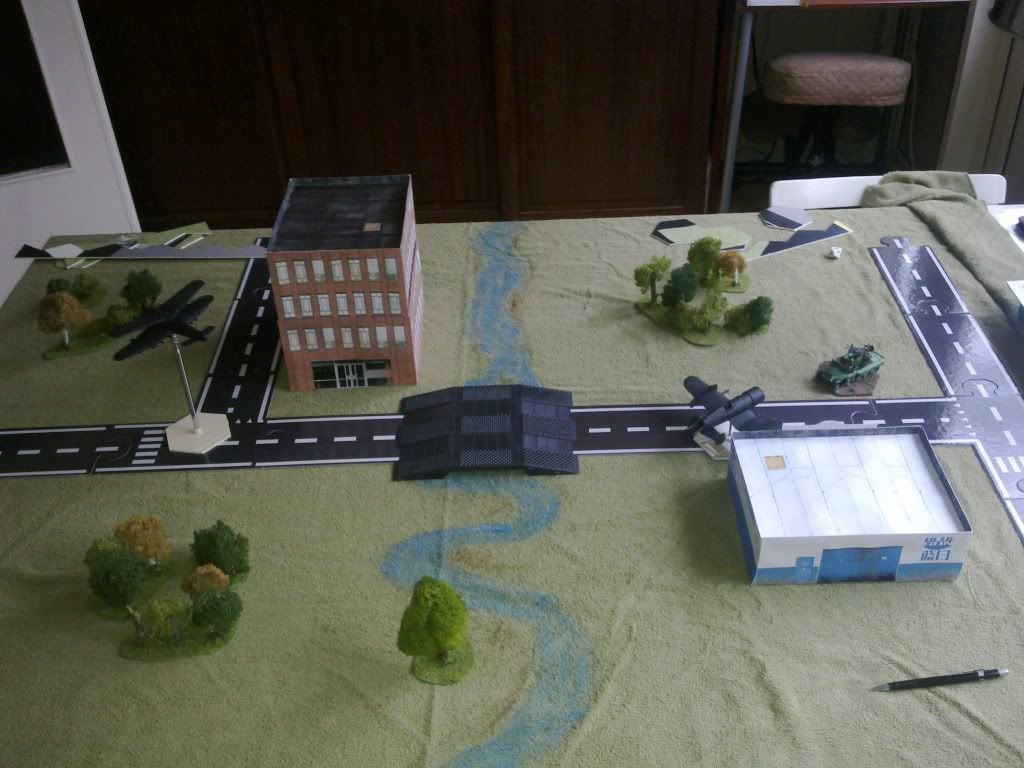
I did try a quick proof-of-concept solo game, using two of the 1/72nd planes, the guntruck and some random terrain I already have for other games.
This was a few game turns in:
 I had one plane on the flight stand Gunbird loaned me, and the other on a semi-improvised "nape of the earth" base (essentially just a hex base with a nail in it....).
Here are my preliminary observations:
-I need to rip off the turret of the guntruck and magnetize it! Turning it is just way too fiddly at the moment....
-The idea for plotting movement works quite well. It's almost as quickly as just using regular hexes.
It requires quite a bit of on the fly fudging though, I had odd angles and half-hexes in shooting ranges almost every turn... Stacking models need a solution as well.
-The ratio of base/hexsize to size of planes/terrain means you will make more use of high speed, low-G maneuvres. G-rating becomes less vital, and speeds feel slower somehow.
I guess I could see it as if each game turn represents only a second of real-time instead of the 5-10+ seconds it represents in the original scale. May need to extend the maximum number of turns you can play in order to get some action in.
-I don't have proper stats or damage sheets for ground based units! I'll need to figure something out for that....
-Don't do strafing runs over open ground towards a quad .40 AA gun... It'll bust your plane up bad. :-D
I really should have used the building for cover first and then "hopped" over it for a short range burst, in hindsight. Thing nearly sheared my wing off!
I didn't have the time or opportunity to see how the improvised altitude rules I posted a few days ago work out. May need to run another test game sometime just for that, if/when I have 2 altitude bases available.
Oh, and a second pic of cool moment in the game:

I did try a quick proof-of-concept solo game, using two of the 1/72nd planes, the guntruck and some random terrain I already have for other games.
This was a few game turns in:
Here are my preliminary observations:
-I need to rip off the turret of the guntruck and magnetize it! Turning it is just way too fiddly at the moment....
-The idea for plotting movement works quite well. It's almost as quickly as just using regular hexes.
It requires quite a bit of on the fly fudging though, I had odd angles and half-hexes in shooting ranges almost every turn... Stacking models need a solution as well.
-The ratio of base/hexsize to size of planes/terrain means you will make more use of high speed, low-G maneuvres. G-rating becomes less vital, and speeds feel slower somehow.
I guess I could see it as if each game turn represents only a second of real-time instead of the 5-10+ seconds it represents in the original scale. May need to extend the maximum number of turns you can play in order to get some action in.
-I don't have proper stats or damage sheets for ground based units! I'll need to figure something out for that....
-Don't do strafing runs over open ground towards a quad .40 AA gun... It'll bust your plane up bad. :-D
I really should have used the building for cover first and then "hopped" over it for a short range burst, in hindsight. Thing nearly sheared my wing off!
I didn't have the time or opportunity to see how the improvised altitude rules I posted a few days ago work out. May need to run another test game sometime just for that, if/when I have 2 altitude bases available.
Oh, and a second pic of cool moment in the game:
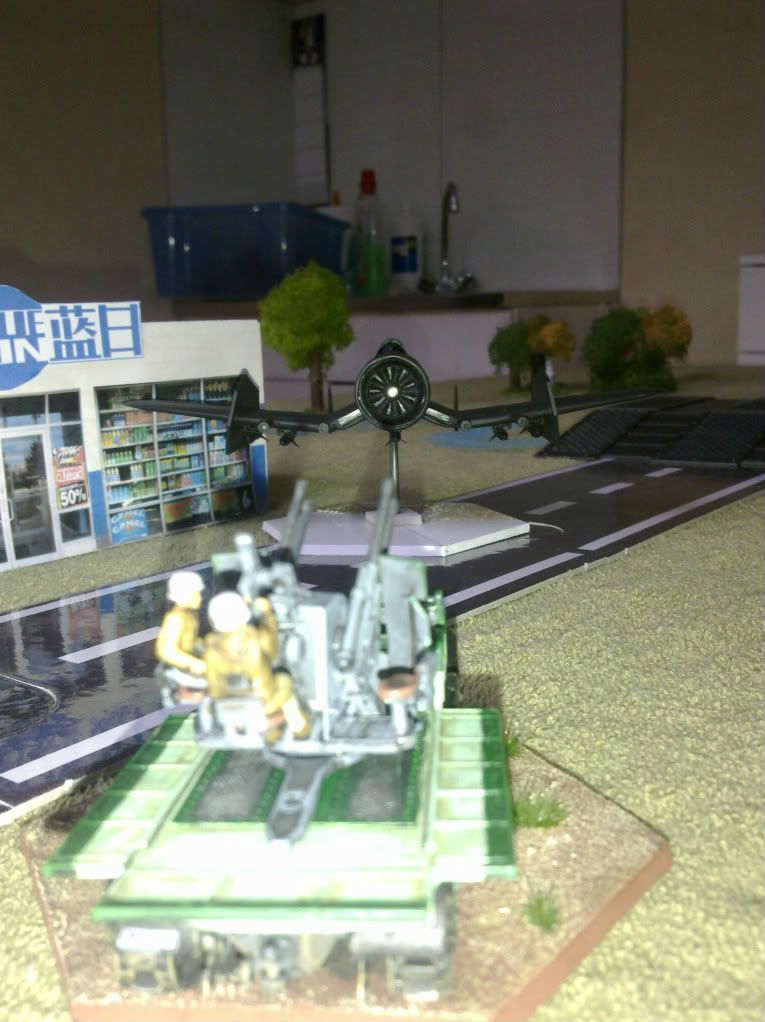
A tense moment before they discover who is faster on the trigger....
zaterdag 21 januari 2012
How I made the Brigand
I've had several requests to describe in more detail how I made the Brigand and Devastator in 1/72nd scale.
I'll start with explaining the Brigand. Sadly this will be a how-to without pictures: I've already built both Brigands I intend to build for the time being.
When/If I ever "need" to build a 3rd or 4th Brigand I'll update this how-to with pictures.
What you will need:
-1 Model of an F1U Corsair in 1/72nd scale. (I used an old Revell one, kit # 04112. It's an old, clunky kit with raised panel lines, but it was cheap....) Note: To save you some plasticard work, try to find a kit that has the rudder in two halves as part of the fuselage halves.
-.020"/.5mm and .040"/1mm plasticard.
-A pair of small (2x1mm) rare earth disc magnets, if you want to magnetize the prop (which makes it harder to damage: to much force and it simply pops loose instead of bending/breaking)
-2.5 and 3.2 mm plastic rod/tube (for the guns)
-A spare canopy for the turret (fairly small, early Spitfire or Hurricane should do).
-Suitable bits to make the payload from.(In my case: a small bomb that came with the Corsair kit, 2 Nebelwerfer shells and 2 1/35 PaK shells...)
-Something to make the prop spinner from (I used a part I cut from the drop-tank the Revell Corsair comes with.)
-Your usual model building tools
How to build it:
Step 1: The fuselage:
Glue the two fuselage halves together per the kit's instructions but be careful not to glue the two halves of the rudder together.
If the instructions require you to assemble and glue the cockpit inside the fuselage at this stage, do so.
Step 2: Shortening the fuselage:
Just before the point where the rudder starts to rise from the fuselage, there should be a panel line.
Use this panel line as a guide to saw the last part of the tail from the fuselage. Check that the two parts of the rudder are still separate and put the sawn-off part aside.
Glue a plate of plasticard over the resulting hole, file flush with the fuselage.
Step 3: Turret:
Onto the plasticard plate you just glued on, build a turret to fit the spare canopy you have.
Use lengths of the 2.5mm plastic rod/tube to represent the .30 cal guns in the turret.
(Sorry, I can't give any more precise instructions on this. I always eyeball/improvise this step....)
Step 4: Building the tail rudders:
Trim and glue the elevators together into one plane (join them where they usually connect to the fuselage). Make sure the outside edge is straight, this is where you will attack the rudders/winglets.
Separate (saw or cut) the pieces of rudder apart from the stump of the tail you cut off in the second step. Saw off the lower 1/4th of them, save these pieces. Use the upper 3/4ths to make the rudder/winglets.
Glue the lower quarter together, use these as the pylon that connects the plane of the joined elevator to the hull. Glue this assembly to the hull.
Step 5: The wings:
Assemble the wings, as per the kit's instructions. Wheels up or down? You decide.
Leave off any guns. Do not attach the wings to the fuselage yet.
Check the panel lines on the wing's upper surface. There should be a large panel over the guns, with two rows of 3 rectangular panels to the outside of these. Use the panel line that separates these two rows of 3 rectangles as a cutting guide and saw through the wings at this point. Your cutting line should run from leading to trailing edge. Make sure this cut is neat! You will be joining the wings back together along this cut later.
From the 1mm/.040" plasticard, cut the two directional stabilisers that intersect the wing.
You can use the hastily drawn and guesstimated template I used (see below) or improvise one yourself. ;-)
 Glue the wings back together, with these stabilisers in between. Make sure the wings line back up.
Use the 3.2mm plastic rod/tube to make the .50 cals in the wings, 2 per wing. Glue one in the location where the centre of the 3 original wing guns were. Glue the second one at the bend in the wing. Pin these if you like them sturdy.
Step 6: The cowling and prop:
Assemble the engine cowling (if a separate part from the fuselage) and magnetize the prop (one magnet in the prop, one magnet in the cowling/engine, where the prop axle would be. Watch your polarities!). Make and fit the spinner on the prop.
Next, cut a piece of .020" plasticard, as wide as the cowling is deep and long enough to wrap around it exactly once. Glue this around the cowling.
Plunk the prop in place.
Cut two pieces of .020" plasticard, wide enough to overlap the previous piece by a few mm front and read and each wide enough to completely wrap around the previous. Laminate these around the cowling, make sure the prop, when in place, just clears the front edge of these by a mm or so. Keep their curve as neat a possible.
Neaten up their front and rear edge and round of the edges.
And there it is, your nice butch Brigand engine cowling.
Step 7: Final assembly:
Glue the cowling and wings onto the fuselage. Put in the fittings for the flying stand you want to use. Glue on the cockpit if you want to paint it solid, if not, leave it off until after painting. Fit underwing ordnance.
Make the retractable Zep-gear:
Take the hatches for the retractable tail wheel. Thin these down a bit, if they are thick pieces (they are on the Revell kit). Glue them onto the upper fuselage, between the cockpit and the turret, wide end towards the front, narrow end towards the rear. If needed, file them to be thinner still and match the curve of the upper fuselage. Take bit of putty/plasticard to fill the hole where the tail wheel would normally stick out between the hatches.
Step 8: Finished!
Sit back, smile, admire your handiwork...
(You're allowed to move it around and make flying noises at this point. I know I did....)
Step 9: Paint her up!
What colours? It's your plane, you decide!
Once painted, repeat step 8 to taste. ;-D
The Devastator will follow when I build the second one. To be totally honest though, I'm not a 100% satisfied with the way I built the first Devastator: It does the job and recognizable as a Dev. But, the lines of the fuselage are a bit off, and the forward view from the cockpit is a obstructed. I may need to rethink that one, with a different plane to base the fuselage on.
We'll see.
I'll start with explaining the Brigand. Sadly this will be a how-to without pictures: I've already built both Brigands I intend to build for the time being.
When/If I ever "need" to build a 3rd or 4th Brigand I'll update this how-to with pictures.
What you will need:
-1 Model of an F1U Corsair in 1/72nd scale. (I used an old Revell one, kit # 04112. It's an old, clunky kit with raised panel lines, but it was cheap....) Note: To save you some plasticard work, try to find a kit that has the rudder in two halves as part of the fuselage halves.
-.020"/.5mm and .040"/1mm plasticard.
-A pair of small (2x1mm) rare earth disc magnets, if you want to magnetize the prop (which makes it harder to damage: to much force and it simply pops loose instead of bending/breaking)
-2.5 and 3.2 mm plastic rod/tube (for the guns)
-A spare canopy for the turret (fairly small, early Spitfire or Hurricane should do).
-Suitable bits to make the payload from.(In my case: a small bomb that came with the Corsair kit, 2 Nebelwerfer shells and 2 1/35 PaK shells...)
-Something to make the prop spinner from (I used a part I cut from the drop-tank the Revell Corsair comes with.)
-Your usual model building tools
How to build it:
Step 1: The fuselage:
Glue the two fuselage halves together per the kit's instructions but be careful not to glue the two halves of the rudder together.
If the instructions require you to assemble and glue the cockpit inside the fuselage at this stage, do so.
Step 2: Shortening the fuselage:
Just before the point where the rudder starts to rise from the fuselage, there should be a panel line.
Use this panel line as a guide to saw the last part of the tail from the fuselage. Check that the two parts of the rudder are still separate and put the sawn-off part aside.
Glue a plate of plasticard over the resulting hole, file flush with the fuselage.
Step 3: Turret:
Onto the plasticard plate you just glued on, build a turret to fit the spare canopy you have.
Use lengths of the 2.5mm plastic rod/tube to represent the .30 cal guns in the turret.
(Sorry, I can't give any more precise instructions on this. I always eyeball/improvise this step....)
Step 4: Building the tail rudders:
Trim and glue the elevators together into one plane (join them where they usually connect to the fuselage). Make sure the outside edge is straight, this is where you will attack the rudders/winglets.
Separate (saw or cut) the pieces of rudder apart from the stump of the tail you cut off in the second step. Saw off the lower 1/4th of them, save these pieces. Use the upper 3/4ths to make the rudder/winglets.
Glue the lower quarter together, use these as the pylon that connects the plane of the joined elevator to the hull. Glue this assembly to the hull.
Step 5: The wings:
Assemble the wings, as per the kit's instructions. Wheels up or down? You decide.
Leave off any guns. Do not attach the wings to the fuselage yet.
Check the panel lines on the wing's upper surface. There should be a large panel over the guns, with two rows of 3 rectangular panels to the outside of these. Use the panel line that separates these two rows of 3 rectangles as a cutting guide and saw through the wings at this point. Your cutting line should run from leading to trailing edge. Make sure this cut is neat! You will be joining the wings back together along this cut later.
From the 1mm/.040" plasticard, cut the two directional stabilisers that intersect the wing.
You can use the hastily drawn and guesstimated template I used (see below) or improvise one yourself. ;-)

Use the 3.2mm plastic rod/tube to make the .50 cals in the wings, 2 per wing. Glue one in the location where the centre of the 3 original wing guns were. Glue the second one at the bend in the wing. Pin these if you like them sturdy.
Step 6: The cowling and prop:
Assemble the engine cowling (if a separate part from the fuselage) and magnetize the prop (one magnet in the prop, one magnet in the cowling/engine, where the prop axle would be. Watch your polarities!). Make and fit the spinner on the prop.
Next, cut a piece of .020" plasticard, as wide as the cowling is deep and long enough to wrap around it exactly once. Glue this around the cowling.
Plunk the prop in place.
Cut two pieces of .020" plasticard, wide enough to overlap the previous piece by a few mm front and read and each wide enough to completely wrap around the previous. Laminate these around the cowling, make sure the prop, when in place, just clears the front edge of these by a mm or so. Keep their curve as neat a possible.
Neaten up their front and rear edge and round of the edges.
And there it is, your nice butch Brigand engine cowling.
Step 7: Final assembly:
Glue the cowling and wings onto the fuselage. Put in the fittings for the flying stand you want to use. Glue on the cockpit if you want to paint it solid, if not, leave it off until after painting. Fit underwing ordnance.
Make the retractable Zep-gear:
Take the hatches for the retractable tail wheel. Thin these down a bit, if they are thick pieces (they are on the Revell kit). Glue them onto the upper fuselage, between the cockpit and the turret, wide end towards the front, narrow end towards the rear. If needed, file them to be thinner still and match the curve of the upper fuselage. Take bit of putty/plasticard to fill the hole where the tail wheel would normally stick out between the hatches.
Step 8: Finished!
Sit back, smile, admire your handiwork...
(You're allowed to move it around and make flying noises at this point. I know I did....)
Step 9: Paint her up!
What colours? It's your plane, you decide!
Once painted, repeat step 8 to taste. ;-D
The Devastator will follow when I build the second one. To be totally honest though, I'm not a 100% satisfied with the way I built the first Devastator: It does the job and recognizable as a Dev. But, the lines of the fuselage are a bit off, and the forward view from the cockpit is a obstructed. I may need to rethink that one, with a different plane to base the fuselage on.
We'll see.
donderdag 19 januari 2012
Started painting the AA truck
A quick update on where I got tonight:


What I still need to do:
-Paint the dashboard.
-Do all the metals on the gun and truck.
-Paint the headlights, license plates and such details.
-Paint the crew.
-Paint and finish the base.
-Decide if, and where, I'd want a company logo. Not enough room on the side of the car, sadly.... Maybe put something on the turret shield? I'd need a name and design though. Currently I'm thinking about calling the company Bigg's Anti Aircraft Service, turning the logo/name into "Bigg A.A.S." :-P
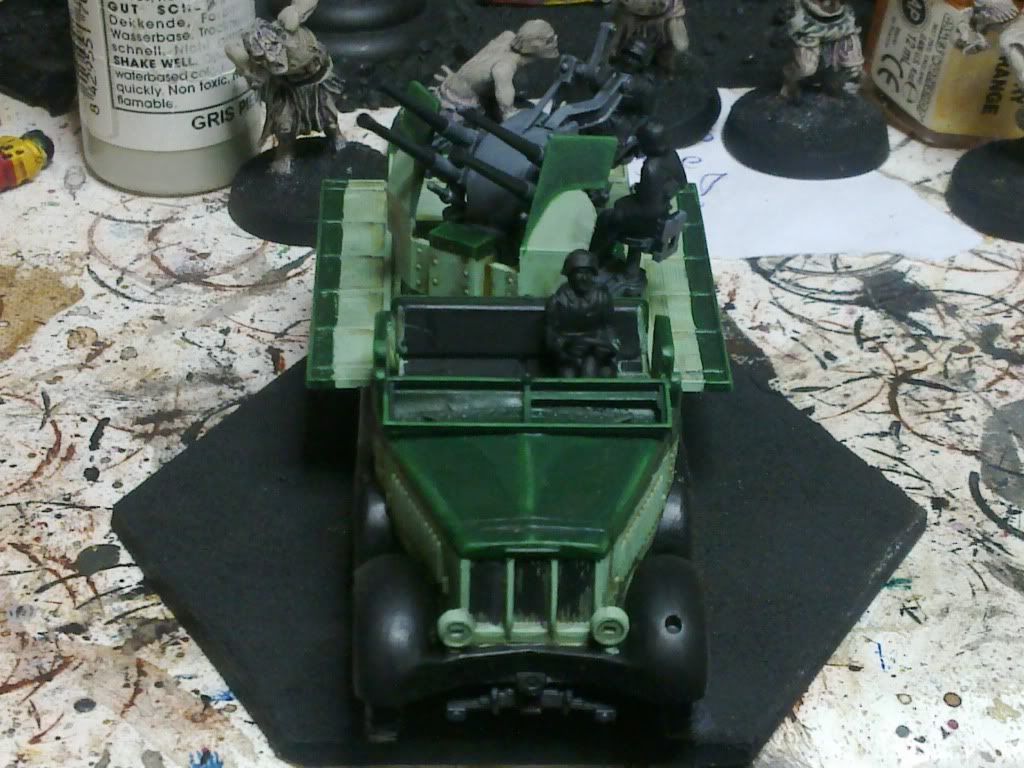
And a better view of the two-tone livery:
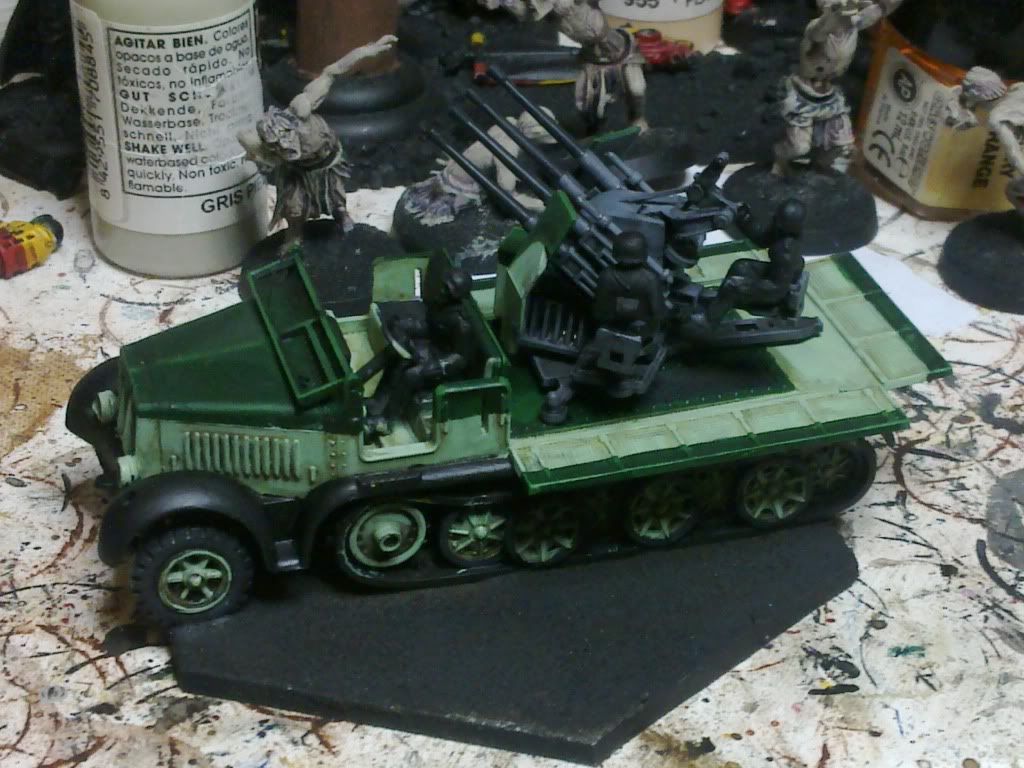
What I've done so far:
-Painted, shaded and highlighted both green tones of the bodywork and wheels.
-Painted and shaded the grey of the chassis and AA gun (I'm still debating wether to highlight the turret or leave it as is.
-Repainted the fenders in good old-fashioned black.
-Painted the front tyres, roadwheel rubber rims and gunbarrels
-Basecoated and shaded the leather seats on both truck and turret.
-Paint the dashboard.
-Do all the metals on the gun and truck.
-Paint the headlights, license plates and such details.
-Paint the crew.
-Paint and finish the base.
-Decide if, and where, I'd want a company logo. Not enough room on the side of the car, sadly.... Maybe put something on the turret shield? I'd need a name and design though. Currently I'm thinking about calling the company Bigg's Anti Aircraft Service, turning the logo/name into "Bigg A.A.S." :-P
Abonneren op:
Reacties (Atom)