That's it then, final deadline* for the Zombtober challenge.
*: Hehe, deadline..zombies..he. Hmm.Right.
This time, a final survivor, I present to you:
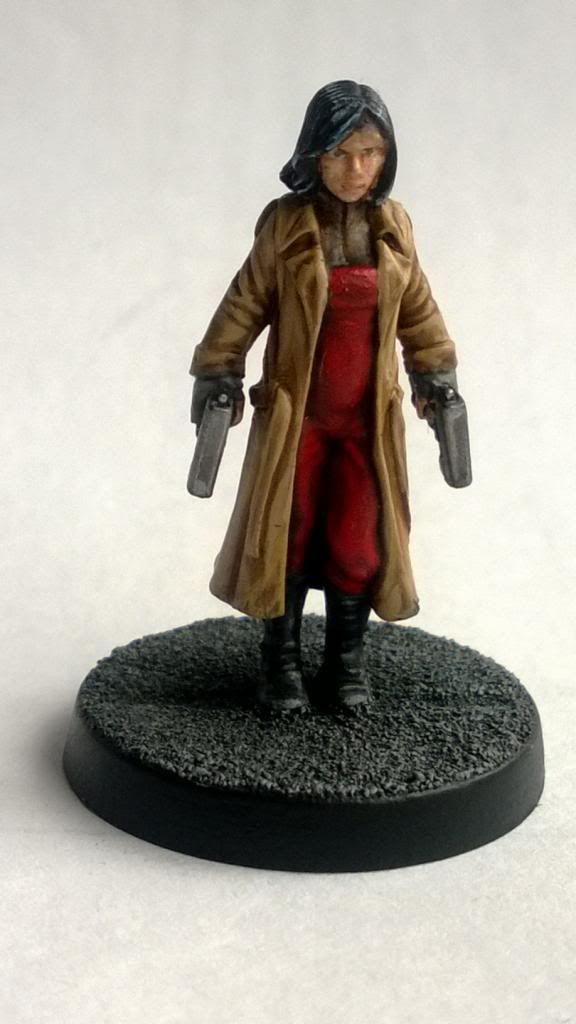
Old Lady Johanssen:
She seems a tough old bat, with her wellies and shotgun and all. Like all of Kev White's sculptures, she was a joy to paint and has great character. During painting I found myself already having ideas for a bit of backstory for her. I've decided that, prior to the zombie outbreak, she grew up in WWII, buried both her sons, and hospitalised two muggers... The zombies are a minor inconvenience to her. At least she can do something constructive about all the brain-dead assholes running around now...
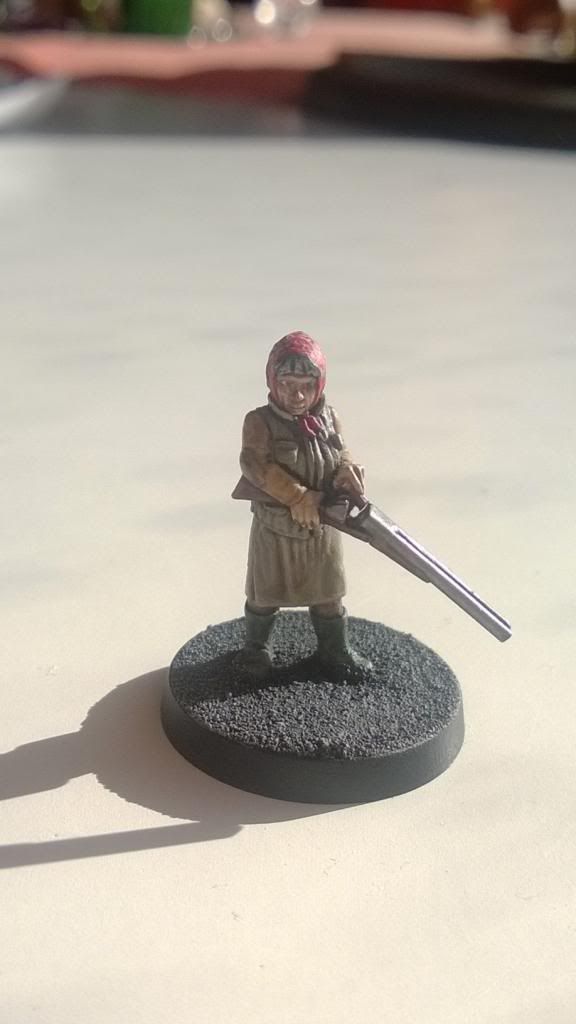
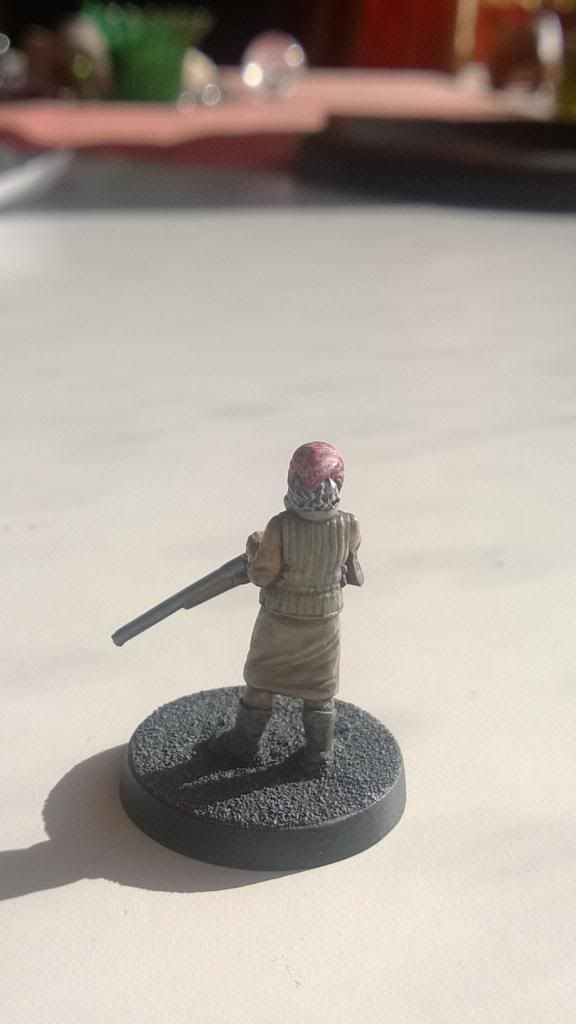
The sun was unnaturally bright today, so her (normally already somewhat muted) tones have been washed out a bit.
Once again, a miniature from the lovely people at Hasslefree Miniatures, this one is Madge.
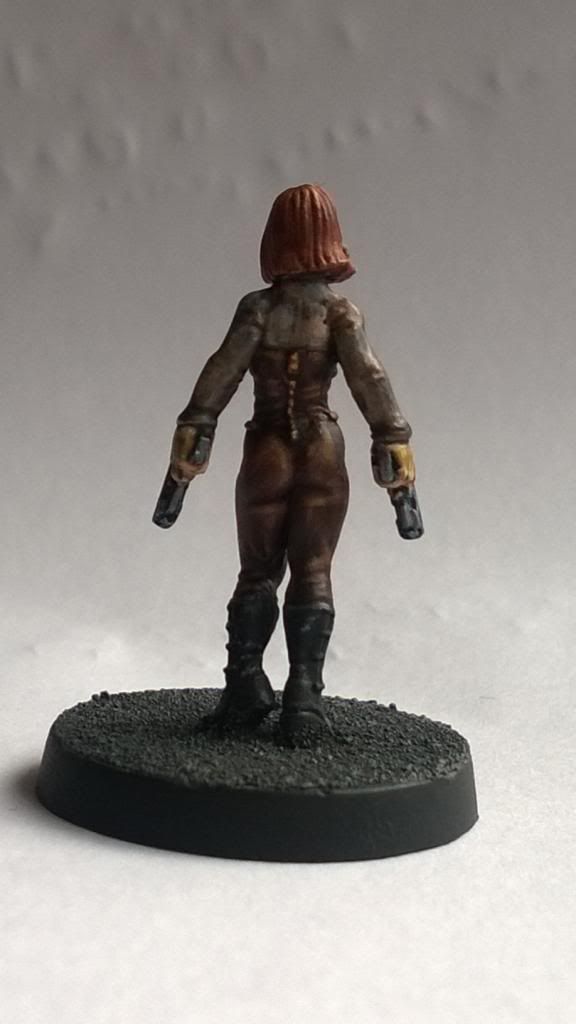
This brings my total current pool of survivors to 10 (plus a weird purple cat...).
I really should do a group shot of them one time.
In the end, this brings my total Zombtober-related painting tally to:
-3 Survivors
-2 "Personality" Zombies (Waldo and Mime)
-12 Lampposts
-1 Section of pavement
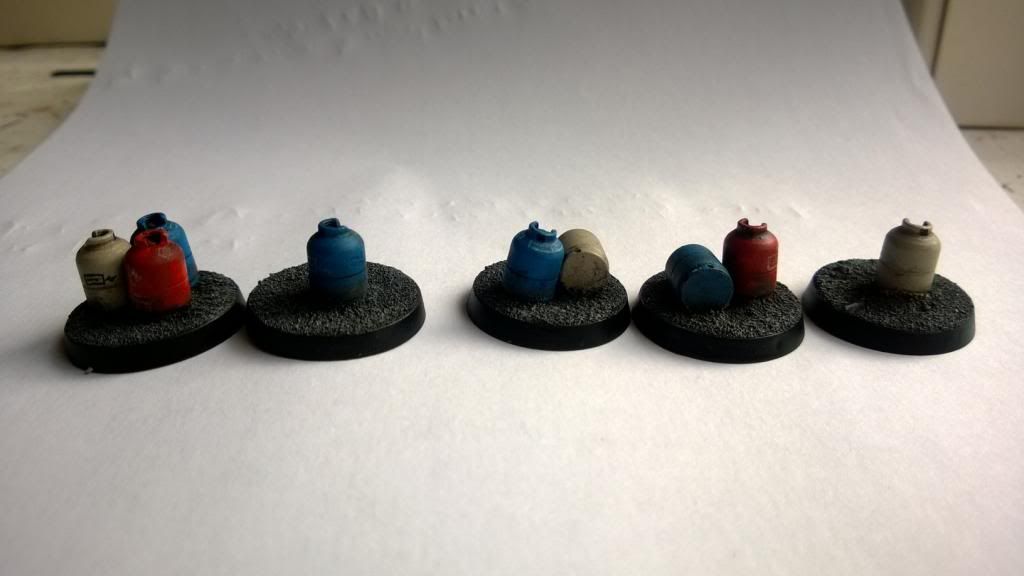
-9 Gas canisters
-4 Fire extinguishers
-1 "Soylent Green" vending machine
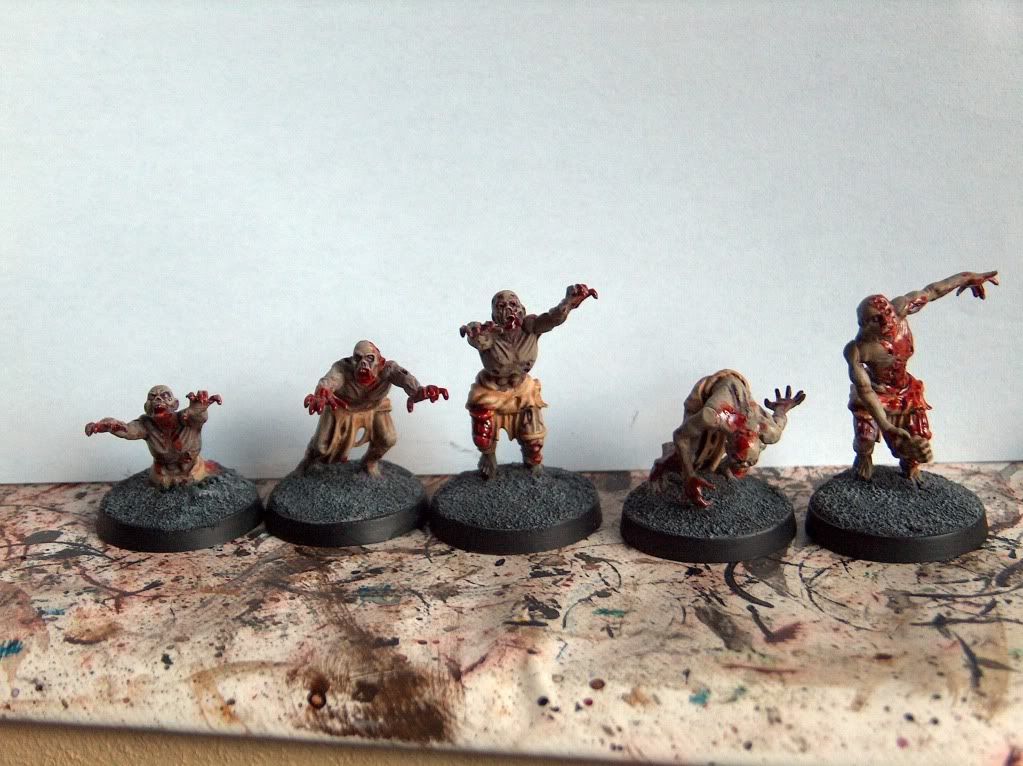
-9 Zombies*
And 1 Portolet....
Not bad at all. (Anything with an asterisk was already paint in progress before Zombtober, all the others are items started and finished in Zombtober itself.)
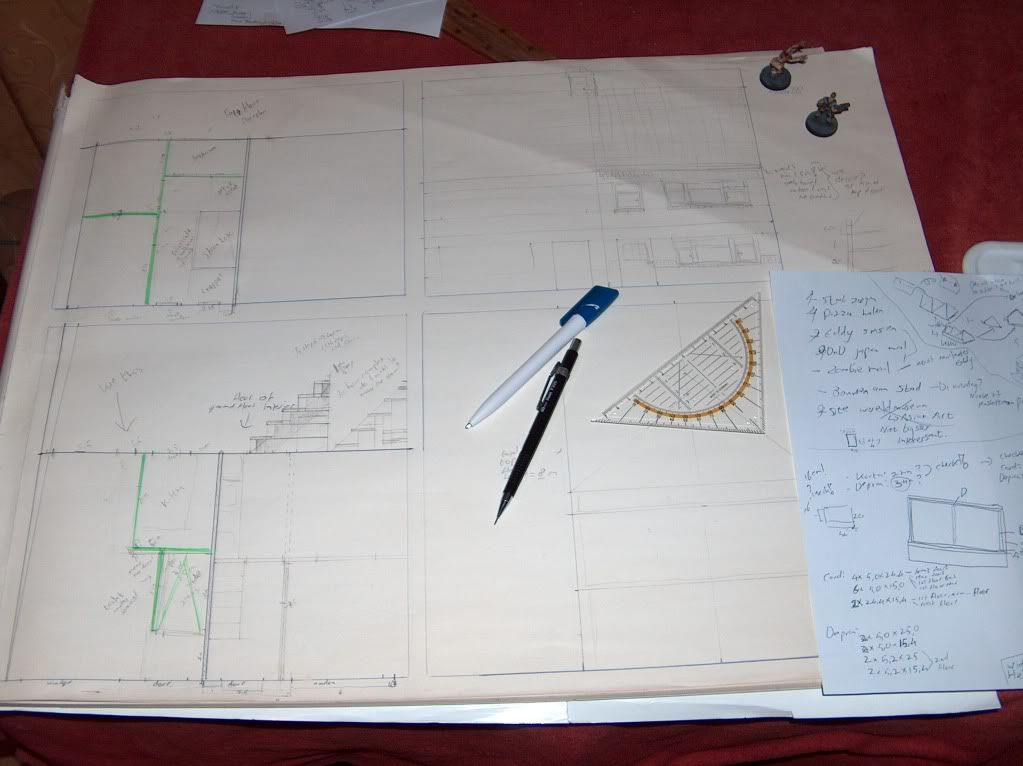
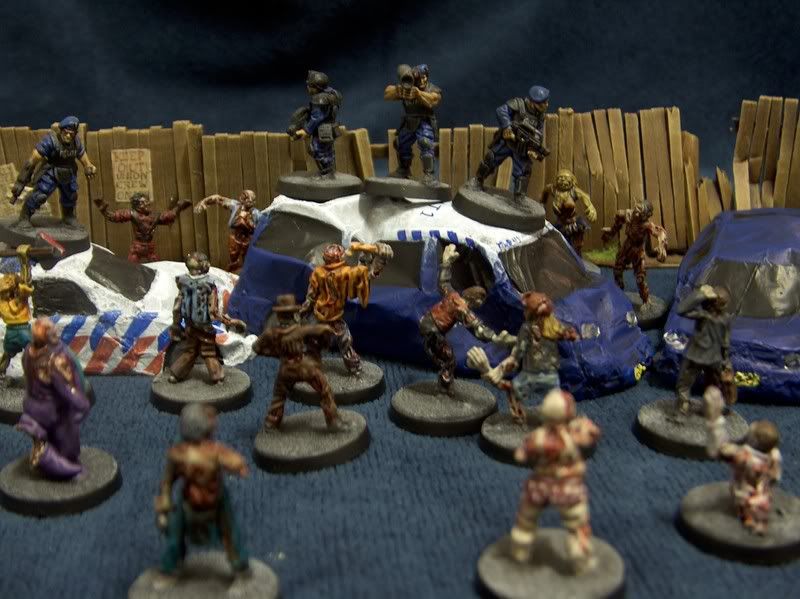
I've still got one item on the Zombtober calendar: On Halloween night, I'll be hosting a Zombie survival game for a couple of friends.
I'm looking forward to it. I just need to quickly finish a rule set for it....
Thank you to all who participated! And the Eclectic Gentleman, especially, for organising the inspiration behind this bout of productivity. Please saunter over to his blog to see what all the other folks have been up to!
Posts tonen met het label Zombies. Alle posts tonen
zondag 27 oktober 2013
dinsdag 22 oktober 2013
Zombtober, three and a half.
Not really a zombie or survivor, as stated in the zombtober challenge, but still related to my greater Zombtober effort.
I've decided to cap off Zombtober with a Zombie survival game on Halloween. This means I need to prep some more stuff that has been long lingering in WIP-limbo.
So I present to you:
The most well-lit street this side of the Zombpocalypse!
Oh, and a portolet....
The streetlights are from Fenris Games (the portolet too, I think, it's been a while since I bought it). They require some bending and assembly, but give a rather nice finish.
I've painted them with a mix of grey (Vallejo London Grey, I think) and Vallejo Metallic medium, followed by a GW Badab Black wash. This gives them a nice dull, corroded aluminium sheen. The lights themselves are painted with a similar mix of an off-white and Vallejo Metallic medium. Gives a good enough effect.
Naturally they aren't fixed permanently onto that single sidewalk. That'd be silly!
The thicker rim you see at the bottom of the lamppost is in fact a rare earth magnet. The sidewalk (like all sidewalks for my one-day modular city) are painted with ferrous (so called "magnetic") paint. This way, I can attach lampposts, street signs, etc. without them having big, conspicuous bases. Plus if someone nudges them during the game, they simply detach, with a minimal risk of damage or breakage!
This particular sidewalk is a quick paint test, for the greater mass of sidewalks. Just black primer, with a few blasts of white primer misted over it. The seams between the tiles and curbstones are simply painted on with dark grey paint.
In the background is my current collection of survivors. Here they are from a little closer up:
Mostly Hassslefree mini's, with a couple of old Grenadier miniatures in for variety.
Now to select which survivor or zombie to paint for zombtober's final week....
donderdag 17 oktober 2013
Zombtober, the third
Whew! It's been a productive week so far!
What I got done:
-2 batches of semi-finished zombies (from the last aborted zombie-painting push some time ago).
-2 themed undead (no special rules, just distinctive for fun and flavour)
-Again some scatter scenery to fill time otherwise spent watching paint dry: 4 fire extinguishers.
Here's the pics, first the two batches I finished off:
Two kids and 2 senior citizens, from Zombiesmith I believe.
Mantic plastic zombies, painted up in orange convict overalls.
And this is the new stuff, started and finished this week, as part of Zombtober:
Silent but deadly.... The zombie Mime, from Hasslefree Miniatures.
When there is no more room in hell, Waldo finds you! Waldo is converted from a Wargames Factory plastic zombie.
Nothing too fancy or elaborate, just basic workman-like paintjobs on these models. After all, they're only part of the hordes of nameless dead. That being said, I rather enjoyed painting these up. Especially the mime and Waldo gave me a certain glee to work on. I'll just quietly slip them into the larger mob, and wait if someone spots Waldo during a game....
Oh, and the fire extinquishers, from Black Cat:
That's it for now, I'll see you again for the next installment of Zomtober!
donderdag 10 oktober 2013
Zombtober, the second
Well, it's an early Sunday this week, but here is my second "entry" for the Zomtober challenge...
I present to you all, Ruby, second of the duo of professional mayhem causers:
(once again with the flaw-enhancing magnification....)
And her lovely aft side (Mr. White certainly knows how to shape his ladies!):
And a little extra, I worked on these while the washes were drying as I worked on Ruby and Blaze:
Useful for when you need to cook, but also when stuff needs to be blowed the heck up... ;-P
I know at least two players in my little group who won't be able to resist shooting at these.
Edit: Oops, it seems I left some things out...
The lovely lady is, ofcourse, Dionne from the ever wonderful people at Hasslefree miniatures.
I got the butane/propane tanks from Fenris Games in their street furniture line.
zaterdag 5 oktober 2013
Zomtober, the first
I just put down the brushes on my first survivor painted in the name of Zomtober.
Here she is (in all her flaw-enhancing magnification...):
The figure is, ofcourse, Hasslefree's excellent Dionne (b) figure.
I've got the version without the trenchcoat as well, she is next in line on the painting table.
I'll be painting her differently from this "Dionne", so I may be able to use them together on the table. I'm imagining them as (twin?) sisters or lookalikes, perhaps operating as a team of professional hitmen/zombie Hunters?
Week one: done, three more weeks left...
Looking through my various survivors and zombies as a result of Zomtober, I'm getting a hankering to play some games again. Maybe a Halloween game to properly finish Zomtober may be in order?
I would first need to find a ruleset I like though...
Here she is (in all her flaw-enhancing magnification...):
And the rear of her coat:
I've got the version without the trenchcoat as well, she is next in line on the painting table.
I'll be painting her differently from this "Dionne", so I may be able to use them together on the table. I'm imagining them as (twin?) sisters or lookalikes, perhaps operating as a team of professional hitmen/zombie Hunters?
Week one: done, three more weeks left...
Looking through my various survivors and zombies as a result of Zomtober, I'm getting a hankering to play some games again. Maybe a Halloween game to properly finish Zomtober may be in order?
I would first need to find a ruleset I like though...
maandag 30 september 2013
Night(s) of the Living Lead
So, there I was, cheerfully minding my own business, gearing myself up to do some =I=Munda stuff again (see the Priest in the previous post)... The great Purge of the Garage is also progressing steadily, I am gathering the nerve, and time, plus sorting room to straighten out my cubic yard (at least) of materials and miniatures I've gathered for the Space Hulk 3D project.
Then this post comes along on the Lead Adventure forum.
I couldn't resist... I mean, come on, we're talking zombies here!
I think this is rather timely, some way. I found the last two weeks I couldn't get myself started or keep going on hobby stuff (besides reading the new Space Marine Codex).
I was wondering why, and this dare made it clear to me; the last few things I've been doing were for projects with a big picture, something I felt I needed to "get right" (WHQ for the misses, Howling Griffons army, =I=Munda, which I more or less think of as doing "art", plus prepping to take on Space Hulk 3D again. All long term projects too...).
I guess I just need to do some one-offs. Just do stuff, without the weight and distractions of a greater project hanging over them. Stuff I can dive into, enjoy the "doing" of it, without considering if it will fit and match with any other stuff or needing to race to the finished product because there is so much more in the project, and once done, put it in the cabinet and not need to think about until the next game I need it for. Cleanse the palate as it were.
I think I'll have go have a root around in the box marked "zombies and survivors" tomorrow... :-)
donderdag 5 januari 2012
Hmpf, it seems the camera is getting worse...
Anyway: today's progress:
And with a quick 5-minute mockup of a roof:
What I still need to do on this one:
-scribe the brick on the sides of the roof walls
-build a proper roof, the mockup is just thin cereal box cardboard.
-build the inner walls and stair.
-Oh, and actually build the doors and windows and such....
I'm actually considering putting off the inner walls, just to see how the building operates with just empty interior spaces. Or should I just forge ahead and save any modifications on the design for future buildings? Stick to plan on this one, and mark it up as "Experiment 1"?
woensdag 4 januari 2012
House 1, Floor 1 done
Well, here is the first floor of the first house:
Sadly my camera is on the fritz, hence the crappy image quality...
Only took me an afternoon, including scribing the brick texture in the walls, but I still need to do the interior walls and stairs.
I'm currently disputing wether to do that first, or build the second floor first.
Sadly my camera is on the fritz, hence the crappy image quality...
Only took me an afternoon, including scribing the brick texture in the walls, but I still need to do the interior walls and stairs.
I'm currently disputing wether to do that first, or build the second floor first.
dinsdag 3 januari 2012
The best laid schemes....
Not much done today, just done some drawing out and calculations for building the first house:
Note the random zombie and survivor to oversee the planning (and to check dimensions....).
maandag 2 januari 2012
Grrr, Arg....
Finished a quick paint job on a couple of Mantic games zombies today:
Nothing fancy paintwise:
-Basecoat of Vallejo Green Grey, followed by a slightly thinned wash of GW Leviathan Purple.
-Drybrush again in basecoat colour, followed by a second drybrush in 50/50 Vallejo Green Grey and Basic Fleshtone.
-Wash in GW Gryphonne Sepia (again slightly thinned).
-Give another light drybrush in the 50/50 mix, just enough to cover the highest points. (I covered my pallet while the wash dried, to save some on mixing. The wash dries fairly quickly anyway.)
-The loincloths and exposed bone were done with Vallejo Iraqui Sand (You'll see this colour come by a lot of times... I love it, it's so versatile!), washed with Gryphonne Sepia and higlighted with Iraqui Sand and Vallejo Pale Sand.
-Gore was done with 50/50 Tamiya Smoke and Tamiya Transparent Red.
And that's it!
Waiting for the wash to dry was actually the most time consuming part of the painting...
Luckily I had some chores to do to help pass the time. :-/
zondag 1 januari 2012
The start of a city
So, now we get to the start of thing. Let's get this blog rolling!
Like I said in my introductory post, I game* a variety of settings and have several genres of miniatures in some state of preparation.. Several of these (Rioters and Riot Cops, Zombies, Appleseed, etc.) are traditionally associated with an urban enviroment.
Guess what I don't have, scenery-wise...
*: Or rather, "build stuff for", seeing how rarely I actually get to play....
So, a city needs to get built. Problem is: Zombies and Rioters are (mostly) contemporary, Appleseed and such isn't. And them I'm not even factoring in things like Warmachine....
My city will need to be flexible.
Here's the plan:
The buildings will be a mix of (somewhat) old-timey and current day brick buildings and more modern/sci-fi "slick"/concrete buildings. That way, by varying the ratio of "brick to slick" I use when setting up the table, I can slide from a bit in the past to the (near-ish) future.
I'm doing this because I also have some Appleseed miniatures in the works, and they require a more "future" city: Leave out the brick, and use only the slick buildings: Instant Olympus!
Somewhere in the future, when the city is far enough along, I could consider adding some typical Warmachine style buildings to complement the brick buildings. But, as I have enough alternatives for Warmachine terrain, that won't be necessary for some time.
The buildings:
Each building will be on a base with an integrated sidewalk.
Because I want the buildings to remain as flexible as possible, I can't have any "street furniture" permanently attached. But I don't like the look of street signs and lampposts with massive bases...
Plus, with permanently attached items or items on larger bases, there is the risk of damage if someone nudges them too hard while moving a miniature.
The solution? Magnets!
I'm painting the sidewalks with so called magnetic paint (paint with ferrous particles mixed in). I painted a set of test-bases and built a street sign and some lampposts (from Fenris Games) and glued magnets to the base of the poles:
Originally I had hoped to use magnets with the same diameter as the poles themselves.
Sadly the magnetic paint didn't have enough pull for that. That is why you see the larger diameter magnets under the lampposts.
Still a lot less intrusive than mounting the lampposts on bases, don't you think?
The street sign turned out to be secure enough with a double stack of magnets.
If anyone nudges them while playing, they will simply move out of the way, or fall over, without being damaged.
Last year (the day before yesterday
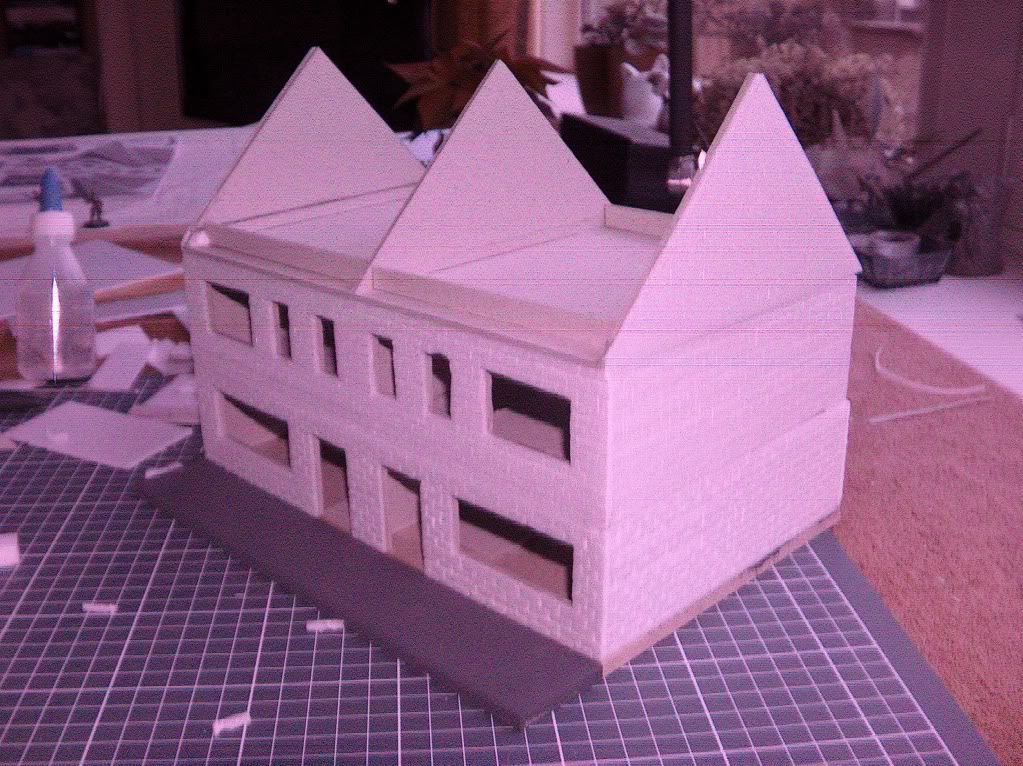
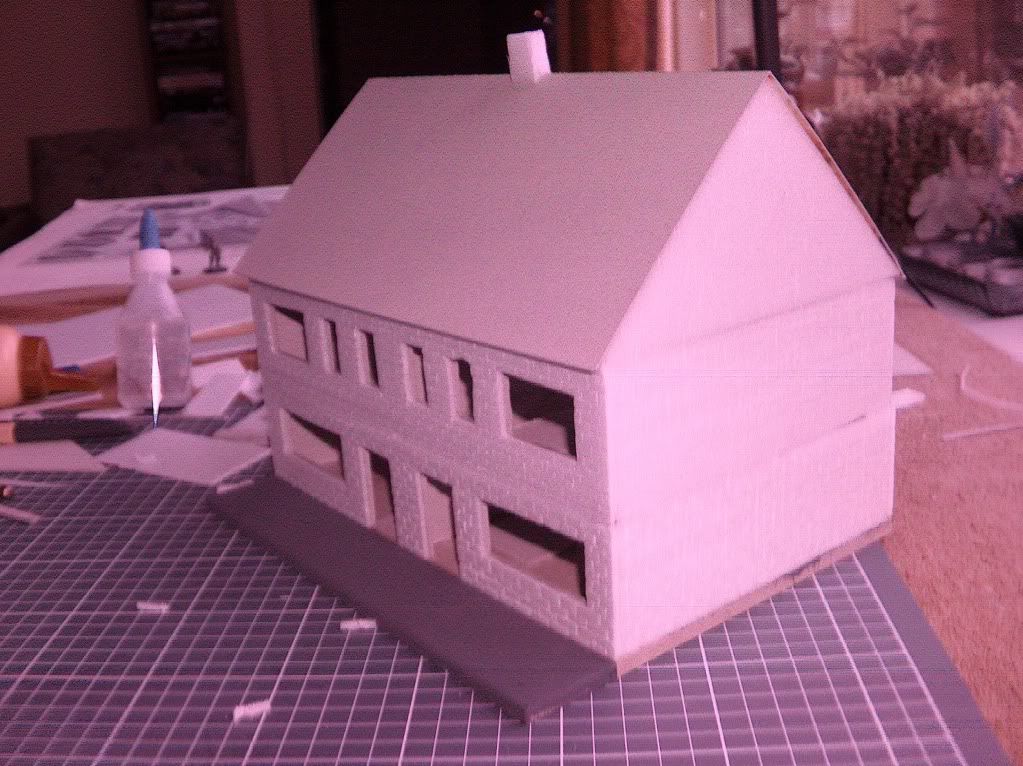
) I painted the magnetic paint on the majority of sidewalks. Here are the building bases with the magnetic paint drying:
![[image] [image]](https://lh3.googleusercontent.com/blogger_img_proxy/AEn0k_sZDiJLY--LPEtxsINE90CjC8Qs5xWiawxDAa7JPM_tJIShp0MiCgRFxS9cxUsI5piUaOPo7R4x0O3nvx1XPOathrCBxMQ70im15ZdjcDGcfGEyvqfyqrm9kh6umVESa-aU8cnmM-dIwC2gU_ca=s0-d)
I intend to have all buildings have an accessible interior. Mostly this will mean no more than some interior walls and stairs. I want to keep the interiors as uncluttered and useable as possible. The more I put inside, the less room for miniatures, and the more I pin myself down to a particular era or setting.
Plus, I like to have some of my sanity remain intact....
So I'm ready to start on the next phase: the buildings themselves.
I've got enough sturdy card and depron for the brick buildings. I still need to get the foamboard and/or foamed PVC for the slicker buildings, so those will come later.
That also gives me the time to work out shapes and layout for a couple of Appleseed landmarks: Onimal Coffee house and Akechi motors. I really like the idea of building these. I may build them with replaceable signage,though, so I can use the buildings themselves for other settings as well.
I couldn't help setting up a quick "proof of concept" with some of the stopgap scenery I'd been using so far:
![[image] [image]](https://lh3.googleusercontent.com/blogger_img_proxy/AEn0k_sPMxgCTpFzcob_eS2_vKkcdI6lsEa5NYxFGYty0viADRdbUg4EaE8JnOQJngo6wbl5SC-B5eXFIaGNTVXPM1wrk6A0RU4PaMuHECqacPkG2F6K_fuaXcm9dGAO4BHeK6VEGE-BNKOTJxQP0Woq=s0-d)
![[image] [image]](https://lh3.googleusercontent.com/blogger_img_proxy/AEn0k_v5WapX5BcNRH1Vb8tq7A23n-BvQex5_nnKSMt2truFBVy9TIEqbdPDdkWj2AMyvvBPlLW0-mlomw1rd6ip7--UkDPHt76zIboybuj9HJ4wp50Mm0I91WMvWVO9c-Mn_spl9H8ijKF2E5LlRXMo=s0-d)
![[image] [image]](https://lh3.googleusercontent.com/blogger_img_proxy/AEn0k_uBvvxsf0bdKp-xrY1vf-cN0fCLTNkp55EOcZO85RW3WJkGBB7iQAZSc0hZMeMdawHyIIg7_1bOMANc36s66G8WZQX9lbkUcavukiomLdGDAgZn3YtTUnlfMiSPTyrznFXsQ03iqwmsca60jbe6=s0-d)
Preliminary conclusion: Yeah, this is gonna work.
I need more corners, though...
Like I said in my introductory post, I game* a variety of settings and have several genres of miniatures in some state of preparation.. Several of these (Rioters and Riot Cops, Zombies, Appleseed, etc.) are traditionally associated with an urban enviroment.
Guess what I don't have, scenery-wise...
*: Or rather, "build stuff for", seeing how rarely I actually get to play....
So, a city needs to get built. Problem is: Zombies and Rioters are (mostly) contemporary, Appleseed and such isn't. And them I'm not even factoring in things like Warmachine....
My city will need to be flexible.
Here's the plan:
The buildings will be a mix of (somewhat) old-timey and current day brick buildings and more modern/sci-fi "slick"/concrete buildings. That way, by varying the ratio of "brick to slick" I use when setting up the table, I can slide from a bit in the past to the (near-ish) future.
I'm doing this because I also have some Appleseed miniatures in the works, and they require a more "future" city: Leave out the brick, and use only the slick buildings: Instant Olympus!
Somewhere in the future, when the city is far enough along, I could consider adding some typical Warmachine style buildings to complement the brick buildings. But, as I have enough alternatives for Warmachine terrain, that won't be necessary for some time.
The buildings:
Each building will be on a base with an integrated sidewalk.
Because I want the buildings to remain as flexible as possible, I can't have any "street furniture" permanently attached. But I don't like the look of street signs and lampposts with massive bases...
Plus, with permanently attached items or items on larger bases, there is the risk of damage if someone nudges them too hard while moving a miniature.
The solution? Magnets!
I'm painting the sidewalks with so called magnetic paint (paint with ferrous particles mixed in). I painted a set of test-bases and built a street sign and some lampposts (from Fenris Games) and glued magnets to the base of the poles:
Originally I had hoped to use magnets with the same diameter as the poles themselves.
Sadly the magnetic paint didn't have enough pull for that. That is why you see the larger diameter magnets under the lampposts.
Still a lot less intrusive than mounting the lampposts on bases, don't you think?
The street sign turned out to be secure enough with a double stack of magnets.
If anyone nudges them while playing, they will simply move out of the way, or fall over, without being damaged.
Last year (the day before yesterday
I intend to have all buildings have an accessible interior. Mostly this will mean no more than some interior walls and stairs. I want to keep the interiors as uncluttered and useable as possible. The more I put inside, the less room for miniatures, and the more I pin myself down to a particular era or setting.
Plus, I like to have some of my sanity remain intact....
So I'm ready to start on the next phase: the buildings themselves.
I've got enough sturdy card and depron for the brick buildings. I still need to get the foamboard and/or foamed PVC for the slicker buildings, so those will come later.
That also gives me the time to work out shapes and layout for a couple of Appleseed landmarks: Onimal Coffee house and Akechi motors. I really like the idea of building these. I may build them with replaceable signage,though, so I can use the buildings themselves for other settings as well.
I couldn't help setting up a quick "proof of concept" with some of the stopgap scenery I'd been using so far:
Preliminary conclusion: Yeah, this is gonna work.
A start of sorts, and some introduction/preamble
Why start this blog?
Well, I've got "several" hobby projects that I alternate between, and it's getting hard to keep track of it all.
So far I've posted it all scattered over several forums, but I want to keep it all in one place for ease of reference. (And hopefully also to keep myself on track and maybe actually finish something for a change....)
I've started a blog before for my Space Hulk 3D project. But as I work on that project only rarely, that blog is infrequently updated and dormant the vast majority of the time. Boooring.
This time I intend to put everything I make/do hobby-wise in this one blog, in the hopes of keeping this one more active and to keep myself going.
Who knows, someone might even read it and maybe like what they see?
What have I done in the past (A.k.a. what could you expect to see)?
Most of that can be found in my Photobucket...
A few highlights:
-The Space Hulk project I mentioned earlier:
-The usual 40K stuff (and some =I=Munda stuff). I'm discovering however that the game, as it has become, doesn't hold my enthusiasm that much anymore. The background story is still very enticing, though (hence the =I=Munda)...
-Zombies, always a favorite!
-Crimson Skies, I just love the setting and the planes.
-I have a 20mm WWII (DAK) army lying unassembled and unpainted in storage somewhere...
-I'm also working on and off on some Appleseed miniatures:
Expect the occasional non-wargaming stuff too, like:
-Toys for my son
-Some amateur propmaking
I tend to regularly switch from one project to another, whatever catches my interest at any given time.
(Unfocussed? I prefer to think of it as spontaneous and diverse. ;-D )
In the next post I will tell a bit more about what I'm working on at this moment.
Well, I've got "several" hobby projects that I alternate between, and it's getting hard to keep track of it all.
So far I've posted it all scattered over several forums, but I want to keep it all in one place for ease of reference. (And hopefully also to keep myself on track and maybe actually finish something for a change....)
I've started a blog before for my Space Hulk 3D project. But as I work on that project only rarely, that blog is infrequently updated and dormant the vast majority of the time. Boooring.
This time I intend to put everything I make/do hobby-wise in this one blog, in the hopes of keeping this one more active and to keep myself going.
Who knows, someone might even read it and maybe like what they see?
What have I done in the past (A.k.a. what could you expect to see)?
Most of that can be found in my Photobucket...
A few highlights:
-The Space Hulk project I mentioned earlier:
-The usual 40K stuff (and some =I=Munda stuff). I'm discovering however that the game, as it has become, doesn't hold my enthusiasm that much anymore. The background story is still very enticing, though (hence the =I=Munda)...
-Zombies, always a favorite!
-Crimson Skies, I just love the setting and the planes.
-I have a 20mm WWII (DAK) army lying unassembled and unpainted in storage somewhere...
-I'm also working on and off on some Appleseed miniatures:
Expect the occasional non-wargaming stuff too, like:
-Toys for my son
-Some amateur propmaking
(That skull is not mine by the way, but storebought....)
And lots more....I tend to regularly switch from one project to another, whatever catches my interest at any given time.
(Unfocussed? I prefer to think of it as spontaneous and diverse. ;-D )
In the next post I will tell a bit more about what I'm working on at this moment.
Abonneren op:
Posts (Atom)